
Installation
Method 1: Using Plugin Installer
After running the installer and choosing your installation language keep clicking the Next button. At some point during the installation you will arrive at the "Choose Destination Location" dialog. On it you could enter the installation location of the HyperTyle plugin. But we recommend that you keep the suggested installation path as you can later use the Plugin Installer tool to conveniently install the plugin.
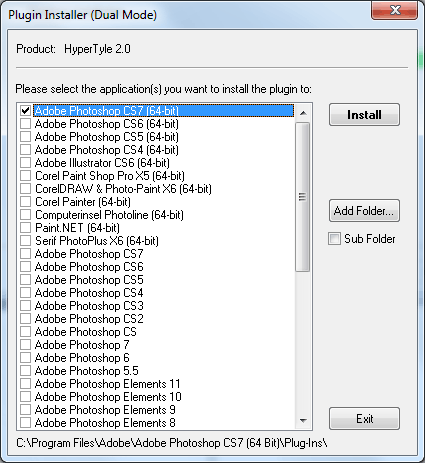
At the end of the installation process the Plugin Installer dialog will be shown with a list of compatible applications, which are installed on your computer. The application at the top of the list is always activated by default. If you want to install HyperTyle into other applications, you should activate them, too. Then press the Install button to copy the HyperTyle plugin into the plugin folder of the selected application(s). Finally leave Plugin Installer with the Exit button.
You can run Plugin Installer again at any time from Start > All Programs > The Plugin Site > HyperTyle 2 Plugin to add HyperTyle to a new or previously installed compatible application.
Note: If your application is not listed in Plugin Installer or if Plugin Installer terminates telling you that it didn't manage to find an application, we suggest to try Method 2 below.
Method 2: Choosing a different installation folder and ignoring Plugin Installer
Method 1 is usually the most convenient way of installing HyperTyle. If you keep your plugins in a folder outside your application's plugin folder, prefer to enter the installation folder in your application's preferences dialog or use an application that is not recognized by Plugin Installer, please do the following: On the "Choose Destination Location" dialog during installation choose your preferred plugin folder. When Plugin Installer opens next, ignore it by closing it with the Exit button.