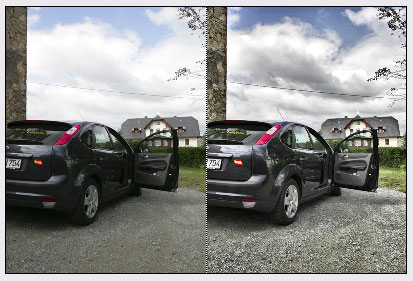
The various split views let you compare the original image side by side with the resulting image.
Using Left, Right, Bottom and Top View
![]()
The Right View displays the effect on the right side of the preview and the Left View displays it on the left side. The Bottom View displays the effect at the bottom of the preview and the Top View displays it on the top. Same with the other two options. To move the separation line between the two versions, you need to activate the split view icon at the top right corner of the preview. The you can use the split view tool to drag the separation line.
Multi
The Multi check box only works in combination with the Split View options. If it is activated, you will see the same image section in each split view area. By default the middle area of the image is displayed in both split views. To display another part of the image you need to set a focus point by choosing the split view tool at the top right corner of the preview and clicking somewhere on the preview.