|
|
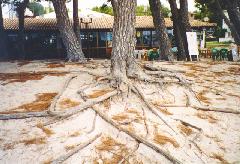
Step
1: Open
any photo whose elements preferably have a vertical orientation like
the one to the left.
|
|
|
|
Step
2: Select
the whole photo and paste it as a new layer.
|
|
|
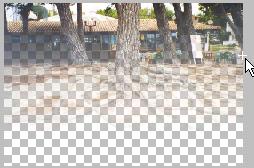
Step
3: Select
the Linear Mask effect of the Alpha Mask group and click on the
preview to blend out the area you want to leave unchanged. You may have
to use the slider to adapt the blending range and activate the Invert
check box.
|

|
|
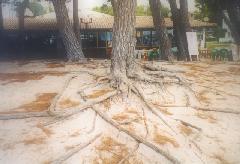
Step
4: Activate
the Bluuur group, select the Cross Blur effect and apply it with
the first slider set to 8 or 16 and the second set to zero.
As you can see
only the area that was visible in the Alpha Tool preview was affected.
|
| |
|
|

|
|
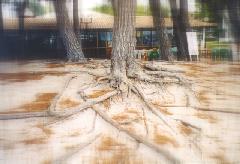
Variation
1: This time the Circular Mask
effect of the Alpha Mask and Outburst Blur from Bluuur was used.
|

|
|
Variation
2: Same as Variation 1, but this time with Cross Blur and
the first slider set to zero. Additionally the Transparency was adapted
with the Alpha Mask > Fade effect.
|
|
|
Variation
3: Same as Variation 1 or 2, but instead of the Bluuur filters
a normal 8-pixel Gaussian Blur was applied.
|
|
|
Variation
4: For this one the Frame I effect of the Alpha Tool and
Cross Blur from Bluuur with both sliders set to 8 was used.
|
| |
|
|
| |
|
Back
to the Index
|