Plugins for Photoshop, Elements, Lightroom, PSP & others
Plugins for Photoshop, Elements, Lightroom, PSP & others
Applying the Edges in Adobe Premiere
I. Using the Edges with the Image Mask Transition
1. Drag the Image Mask transition from the Transitions window into the T(ransition) track between two clips.
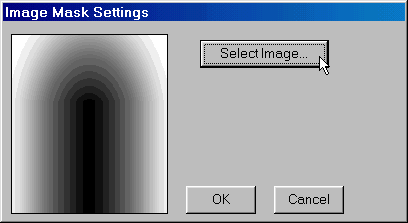
2. The Image Mask Settings dialog will pop up.

3. In that dialog press the Select Image button and select an edge from the edges sub folder in the file dialog.
4. The edge will appear in the preview box on the left.
5. Finally press OK.

You will then see that the second clip is visible on the parts of the first clip that are masked out. To reverse the mask, just press the arrow button on the transition box in the T(ransition) track.
It is recommended to create a virtual clip of this arrangement, if you want to apply further transitions to this clip arrangement.
II. Using the Edges as an Image Matte
1. Drag a video clip onto track S1 (Premiere 5: Video 2 track).
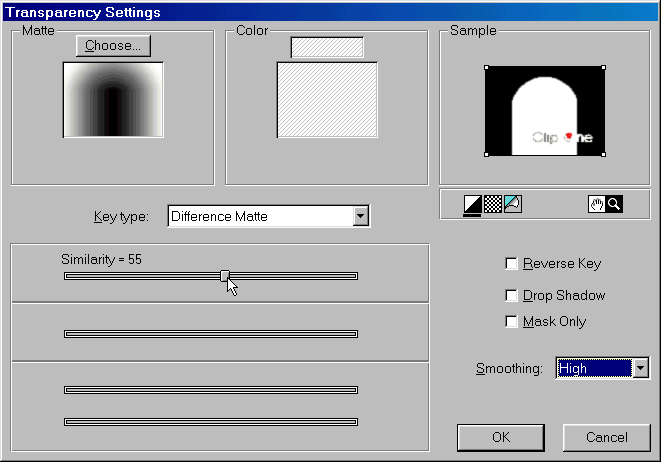
2. Click on this clip to activate it and press <Ctl + T> (Premiere 5: press <Ctl + G>) to invoke the Transparency dialog.

3. Select from the Key type combo box "Image Matte".
4. Click on the Choose button in the top left Matte frame to select an edge in the file dialog.
5. You can see the effect of the edge in the top right Sample frame.
6. There are four options on the right of the dialog: "Reverse Key" let's you invert the mask effect, "Drop Shadow" creates a shadow effect and "Mask Only" ignores the underlying clip. The Smoothing combo box is for activating the smoothing of the mask edges.
7. After you have chosen your settings, press the OK button.