Plugins for Photoshop, Elements, Lightroom, PSP & others
Plugins for Photoshop, Elements, Lightroom, PSP & others
1. Using the Gradients with the Image Mask Transition
Premiere already contains a transition called Image Mask. You can use
it in connection with the gradients from this web site to mask a part
of a video clip.
2. On the Image Mask Settings dialog press
the Select Image button.
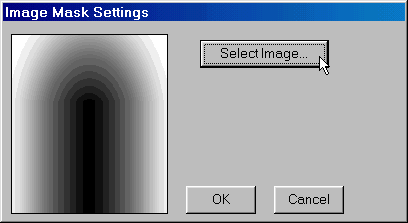
3. After selecting a gradient in the file dialog, it will appear in the preview box on the left.
4. Finally you have to press OK.
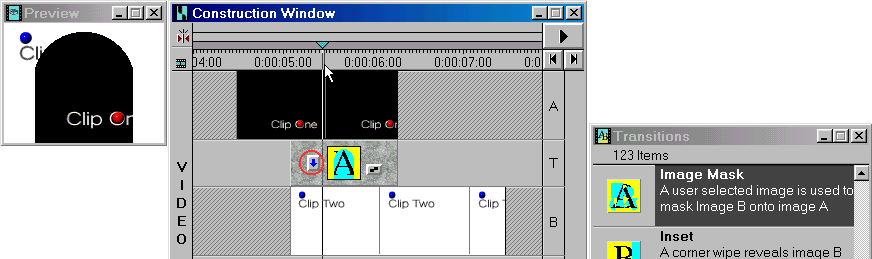
It is recommended to create a virtual clip of this arrangement, if you want to apply further transitions to this clip arrangement.
2. Using the Gradients as a Image or Difference Matte
You can also use the gradients more cleverly and effectively by using the
Transparency dialog that is available for all S tracks.
2. Click on this clip to activate it and press <Ctl + T> (Premiere 5: press <Ctl + G>) to invoke the Transparency dialog.
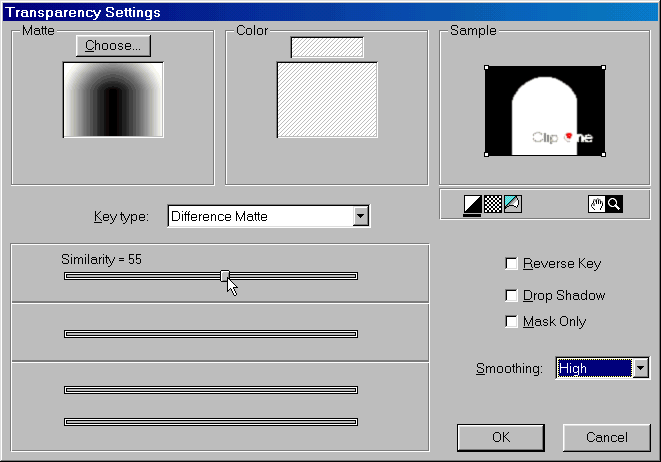
4. Click on the Choose button at the top left to select a gradient in the file dialog. You can see the effect of the gradient in the top right Sample frame.
5. While the Image Matte has no slider, the Difference Matte has a Similarity slider that let's you adjust the effect. The Image Matte gradually blends the two video clips according to the gradient. The Difference Matte on the contrary works similar to the Image Mask Transition and additionally let's you expand or contract the mask with the Similarity slider.
As you can see there are four options on the right. The Reverse Key let's you invert the mask effect, Drop Shadow creates a shadow effect and Mask Only ignores the underlying clip. The Smoothing combo box is for activating the smoothing of the mask edges.
6. After you have chosen your settings, press the OK button.