|
|
|
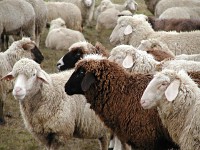
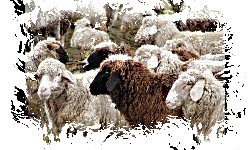
Step 1:
Open a photo which you would
like to convert into a painting in your image application.
|
| |
|
|
|
|
|
Step 2:
Promote it to a layer. This is
usually done by double clicking the background item in
the layer palette. Then make the image larger by adding
some canvas or by using a rectangle selection to cut away
the borders of the photo. Finally you should see a transparent
area around the photo.
|
| |
|
|
|
|
|
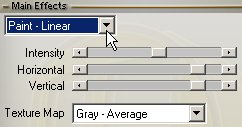
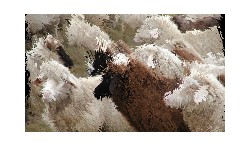
Step 3:
If a selection is present, please
remove it and run HyperTyle. Press the Reset button to
remove any previous settings and select "Paint - Linear"
from the Main Effects combo box. Make sure that Texture
Map is set to one of the Gray items and play with the
three sliders until you get a nice effect.
|
| |
|
|
|
|
|
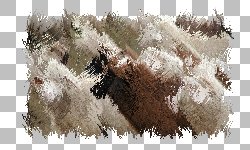
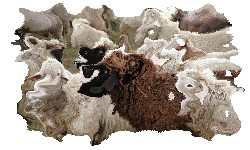
Step 4:
Activate the "Use Transparency"
check box to let HyperTyle modify the border area and
create a nice edge effect. If you want to have only the
edge effect without the paint effect, activate the Opaque
check box.
|
| |
|
|
|
|
|
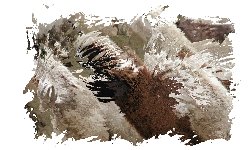
Step 5:
Finally you can make some adjustments
to the effect by using the controls from the Texture and
Adjust tab. In the left image we used a 50 degree rotation,
a Subtle blur effect with a value of 5 and also increased
the value of the Intensity slider on the Main tab.
|
| |
|
|
| |
|
|
|
|
|
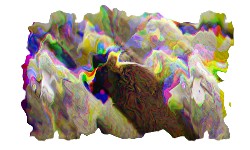
Variation 1:
For this colorful variation a
new texture was opened, Texture Map was set to "Colored",
the Flat slider to 2 and the Intensity slider moved more
to the left.
|
| |
|
|
|
|
|
Variation 2:
This variation was produced by
setting the Blending combo box to Expose, moving the Blending
slider a bit to the left and using yet another texture.
|
| |
|
|
|
|
|
Variation 3:
This time the "Use Transparency"
check box was deactivated, so the artistic border disappeared.
A brush-type texture was opened this time and the Solarize
slider was used to adjust the effect.
|
| |
|
|
|
|
|
Variation 4:
Now we used the "Paint - Radial"
main effect with a pool texture to get a liquid effect.
The Flat slider was set to 3 to get a more smooth look.
|
| |
|
|