This
page shows you the result of replacing an image area with another
color by using LightMachine and similar tools without using
a selection. It is meant to give you the chance to compare LightMachine
with other tools. We tried to do the color replacements in the
other tools as accurately as possible and didn't try to cheat
by using them wrongly. We probably even used them more accurately
than most users do. The names of the other tools aren't mentioned
(only those of Photoshop and Paint Shop Pro), but they are sorted
according to their price.
| Blue to White and
Red |
Blue to Yellow
and Light Blue
|
| |
|
|
LightMachine
($70 / $40)
|
|
|
|
|
|
|
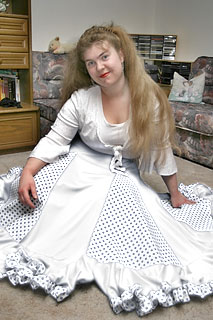
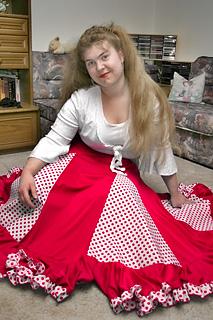
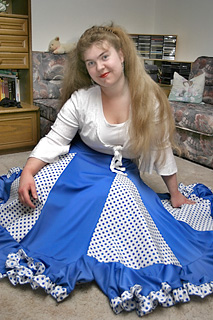
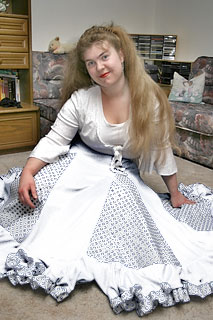
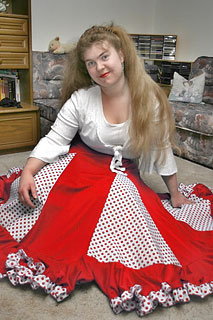
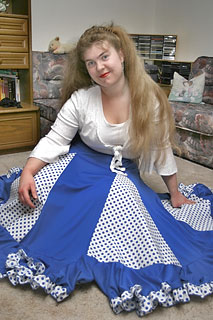
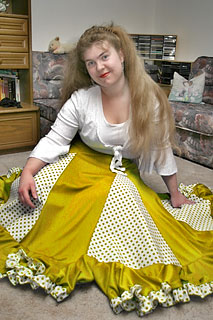
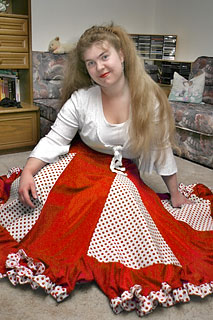
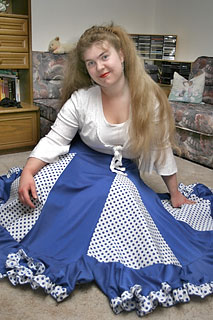
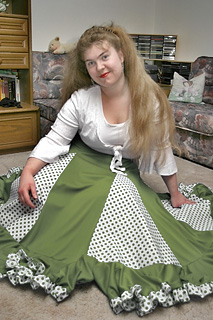
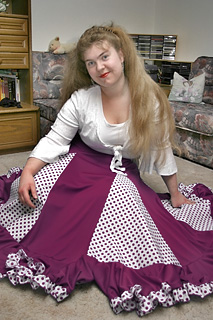
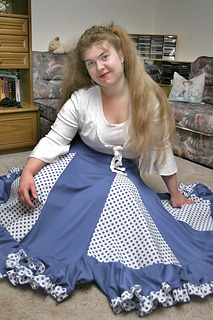
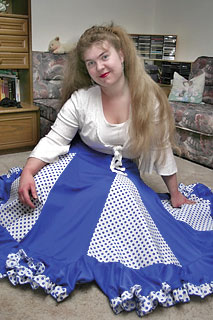
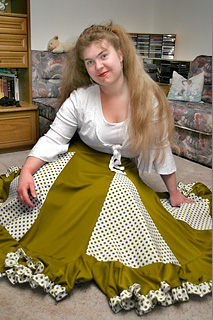
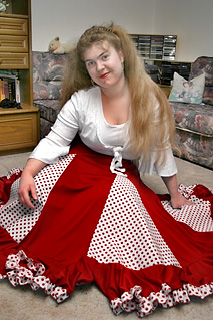
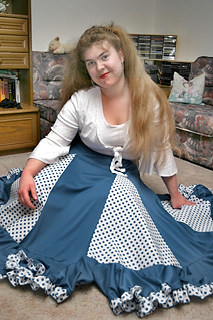
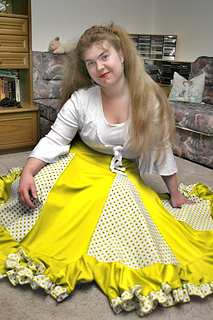
| LightMachine was the
only tool in this test that got the blue skirt white without
producing artifcats. It needed some slider tweaking, but
it worked out nicely. Same is true for the yellow example.
LightMachine's Colors Pro mode easily achieved a fresh red
color and a nice light blue skirt. It would have been possible
to produce darker colors, but for demonstration purposes
we used relative bright colors in all three cases. |
| |
|
|
Photoshop's
Color Replace ($650+)
|
|
|
|
|
|
|
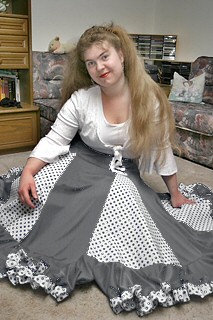
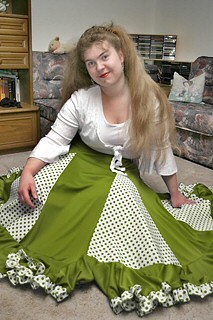
| The Color Replace
tool is quite effective, but has some problems. In the white
example it created quite some artifacts where the dot patterns
are. The other examples turned out fine, but they look flatter
than LightMachine results, because there is no contrast
slider available. |
| |
|
|
Photoshop's
Hue/Saturation Filter ($650+)
|
|
|
|
|
|
|
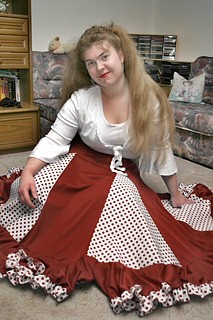
| This tool easily adds
artifacts when using it for selective color adjustments.
The artifacts become quite visible in the yellow example
and also if you have a closer look at the red example.The
blue example turned out quite nicely, but you can't get
it any brighter, otherwise artifacts show up again. Achieving
a white color wasn't possible, you can only get it in grey. |
| |
|
|
Photoshop's
Selective Color Filter ($650+)
|
|
Not Possible
|
|
|
|
|
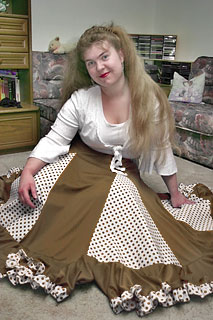
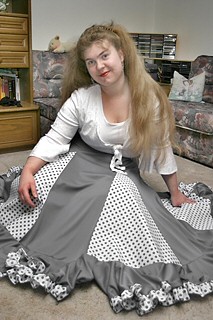
| Photoshop's Selective
Color filter managed to change the color of the skirt, but
its results are not really satisfying, even a lot tedious
of slider tweaking. White didn't work at all, the yellow
is more olive green, the red turned out more bordeaux and
the light blue drifted into cyan. |
| |
|
|
$150
Tool
|
|
|
|
|
|
|
| After small fight
with the inconvenient control of this tool and some discolored
results, we managed to achieve these results. Achieving
a white and yellow color is not really possible. The red
and blue examples on the other hand turned out fine. However,
it wasn't possible to brighten the blue color any further. |
| |
|
|
Paint
Shop Pro's Hue Map Filter ($100)
|
|
Not Possible
|
|
|
|
|
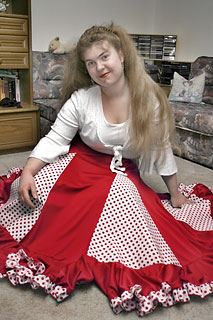
| Apart from the artifacts
that PSP's Hue Map filter produces in some images, it managed
to get the skirt red. A white and yellow color correction
didn't work. The only way to achieve a light blue correction
was to use the Lightness Shift slider, but that caused the
whole image to brighten up in an unnatural way. |
| |
|
|
$40
Tool
|
|
|
|
|
|
|
| This tools only managed
to get a gray, but not white result. The red correction
is fine, but what was supposed to be yellow turned out brownish.
The only way to brighten up the dark blue was to decrease
the Saturation slider, but that produced a more cyan color
instead of light blue. So it doesn't really let you brighten
up the colors. |
| |
|