Plugins for Photoshop, Elements, Lightroom, PSP & others
Plugins for Photoshop, Elements, Lightroom, PSP & others
Luminar 4
by Kay Michael Kuhnlein
|
||||
Hello, I am glad that you provide your attention for my review about Luminar 4. The guys at Skylum are so industrious that I felt obliged to do it once again.?There are various new Al tools in the new version, which achieve extraordinary results with a few clicks. You will be astonished!
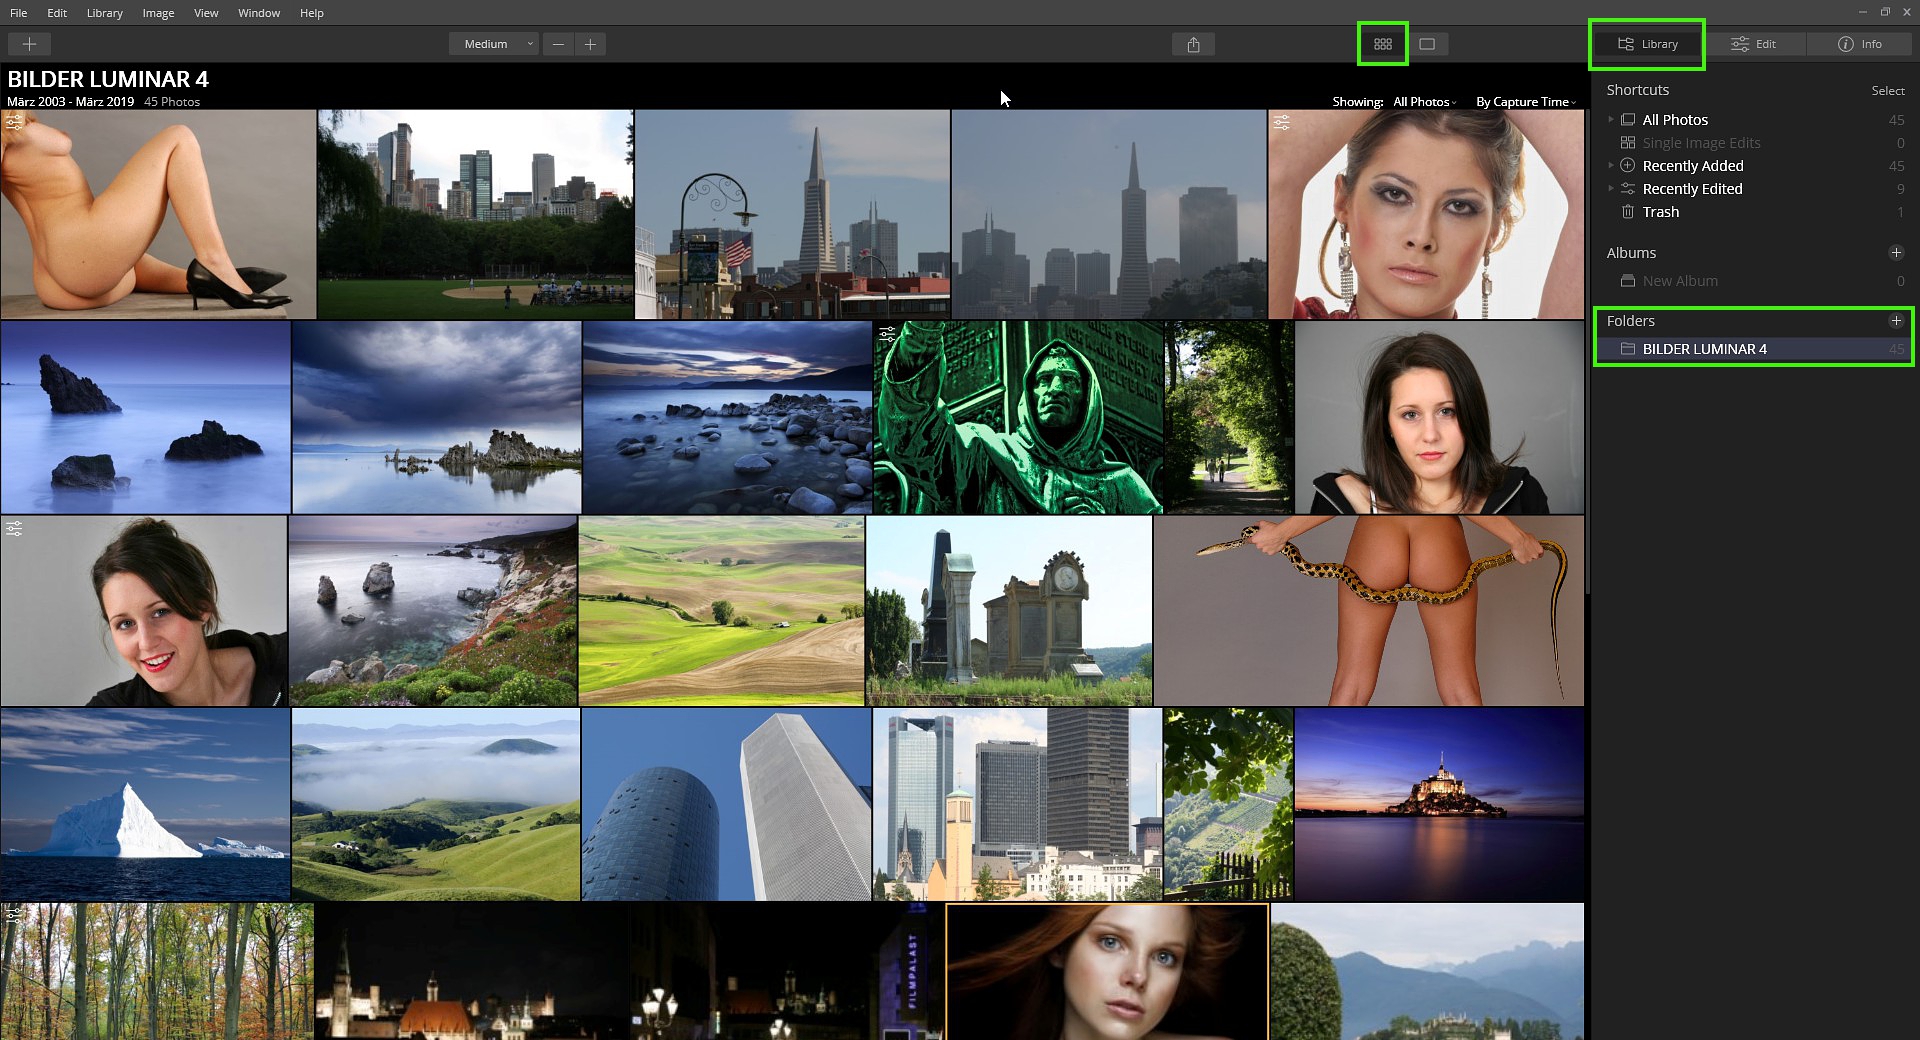
Standalone User Interface
You can sort your images in the library by any criteria you can think of, which lets you quickly find e.g. a special photo for a new project. A very useful feature provided by Luminar 4.
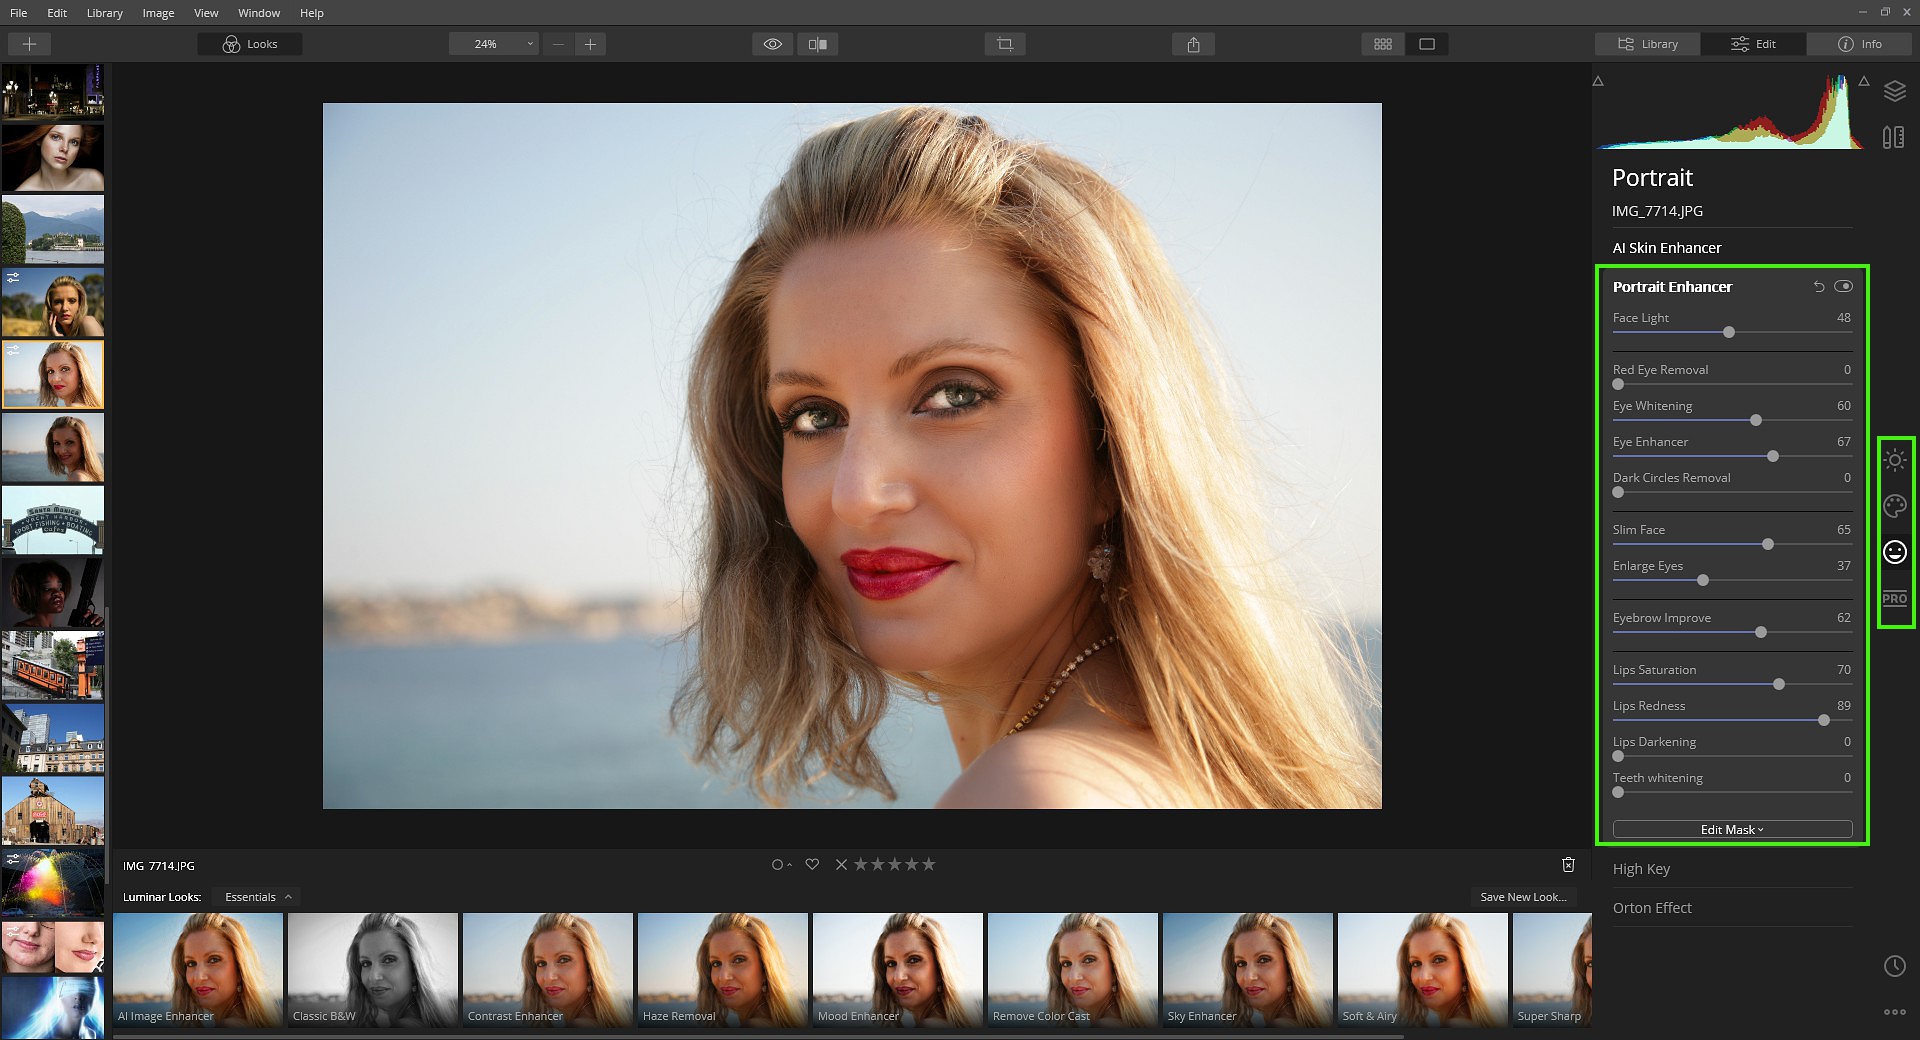
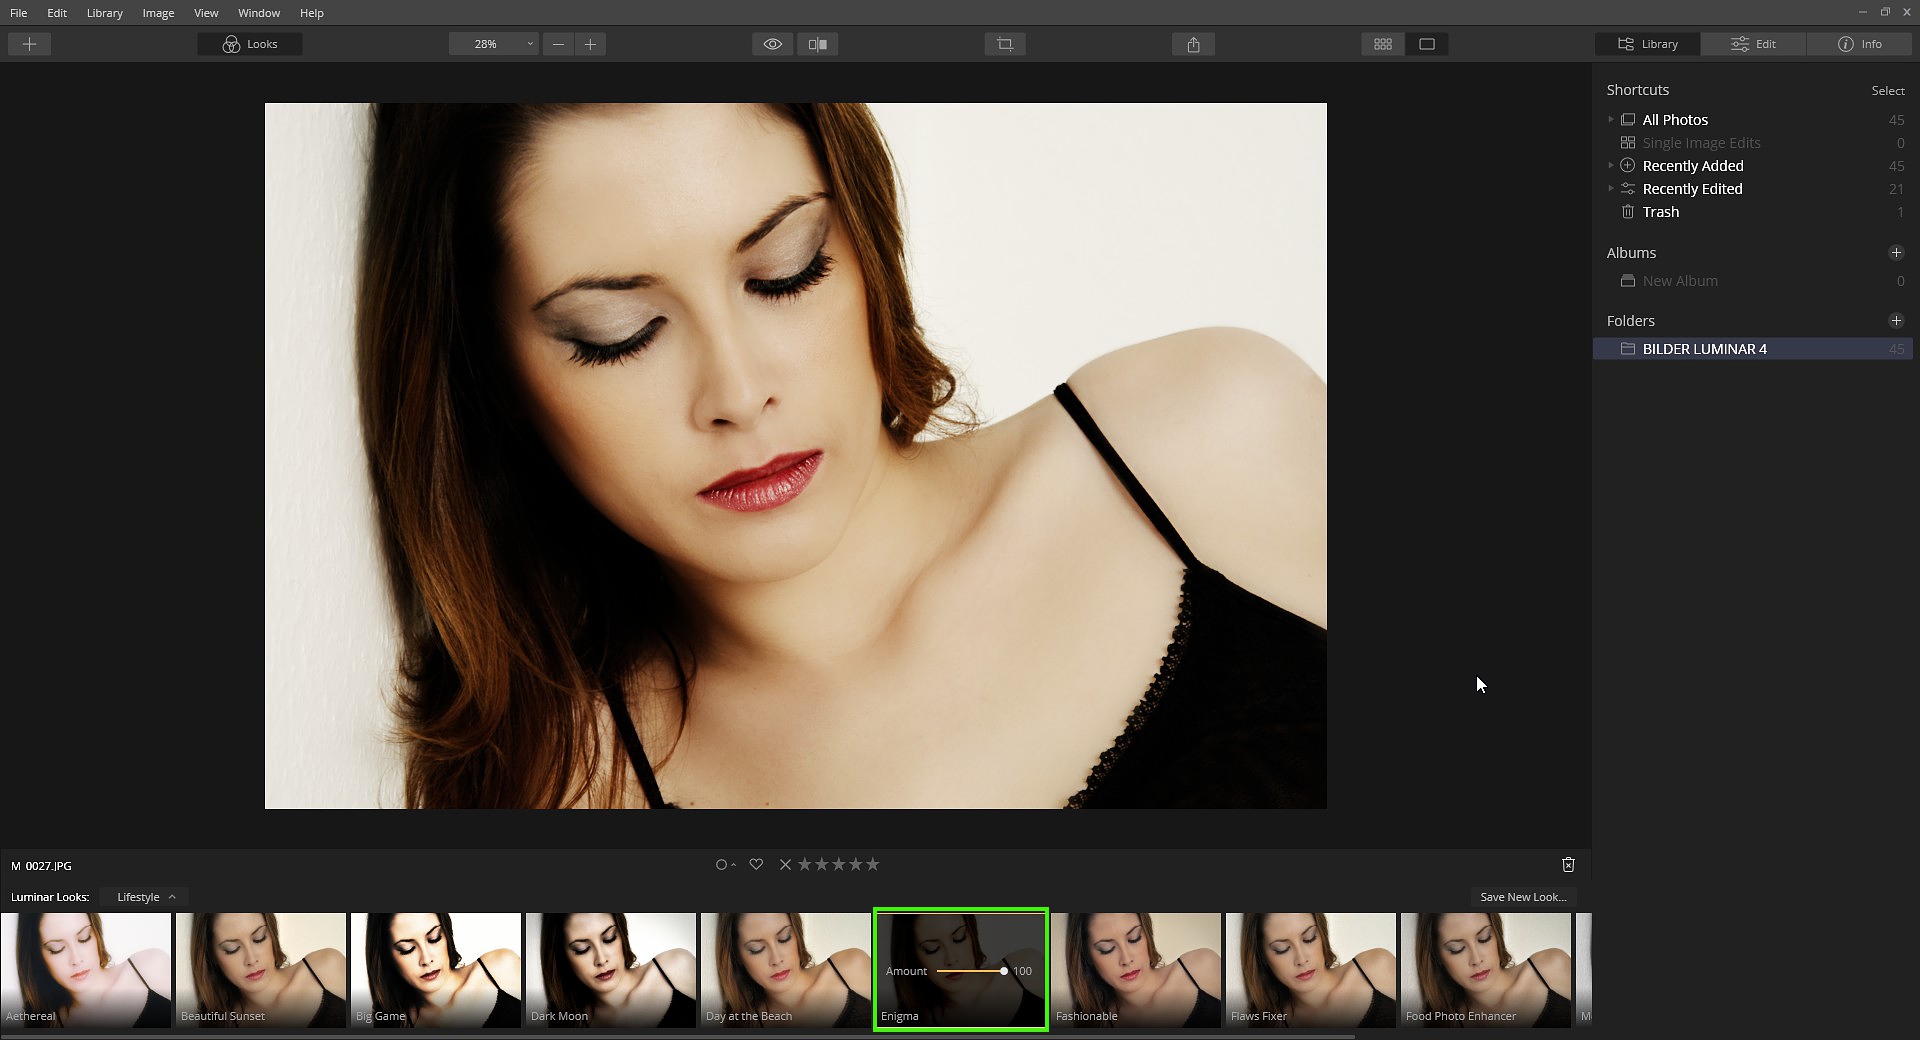
AI Skin Enhancer & Portrait Enhancer My first example is easy peasy. Both desired filters are probably reachable via the Portrait icon. Correct. They are listed there.
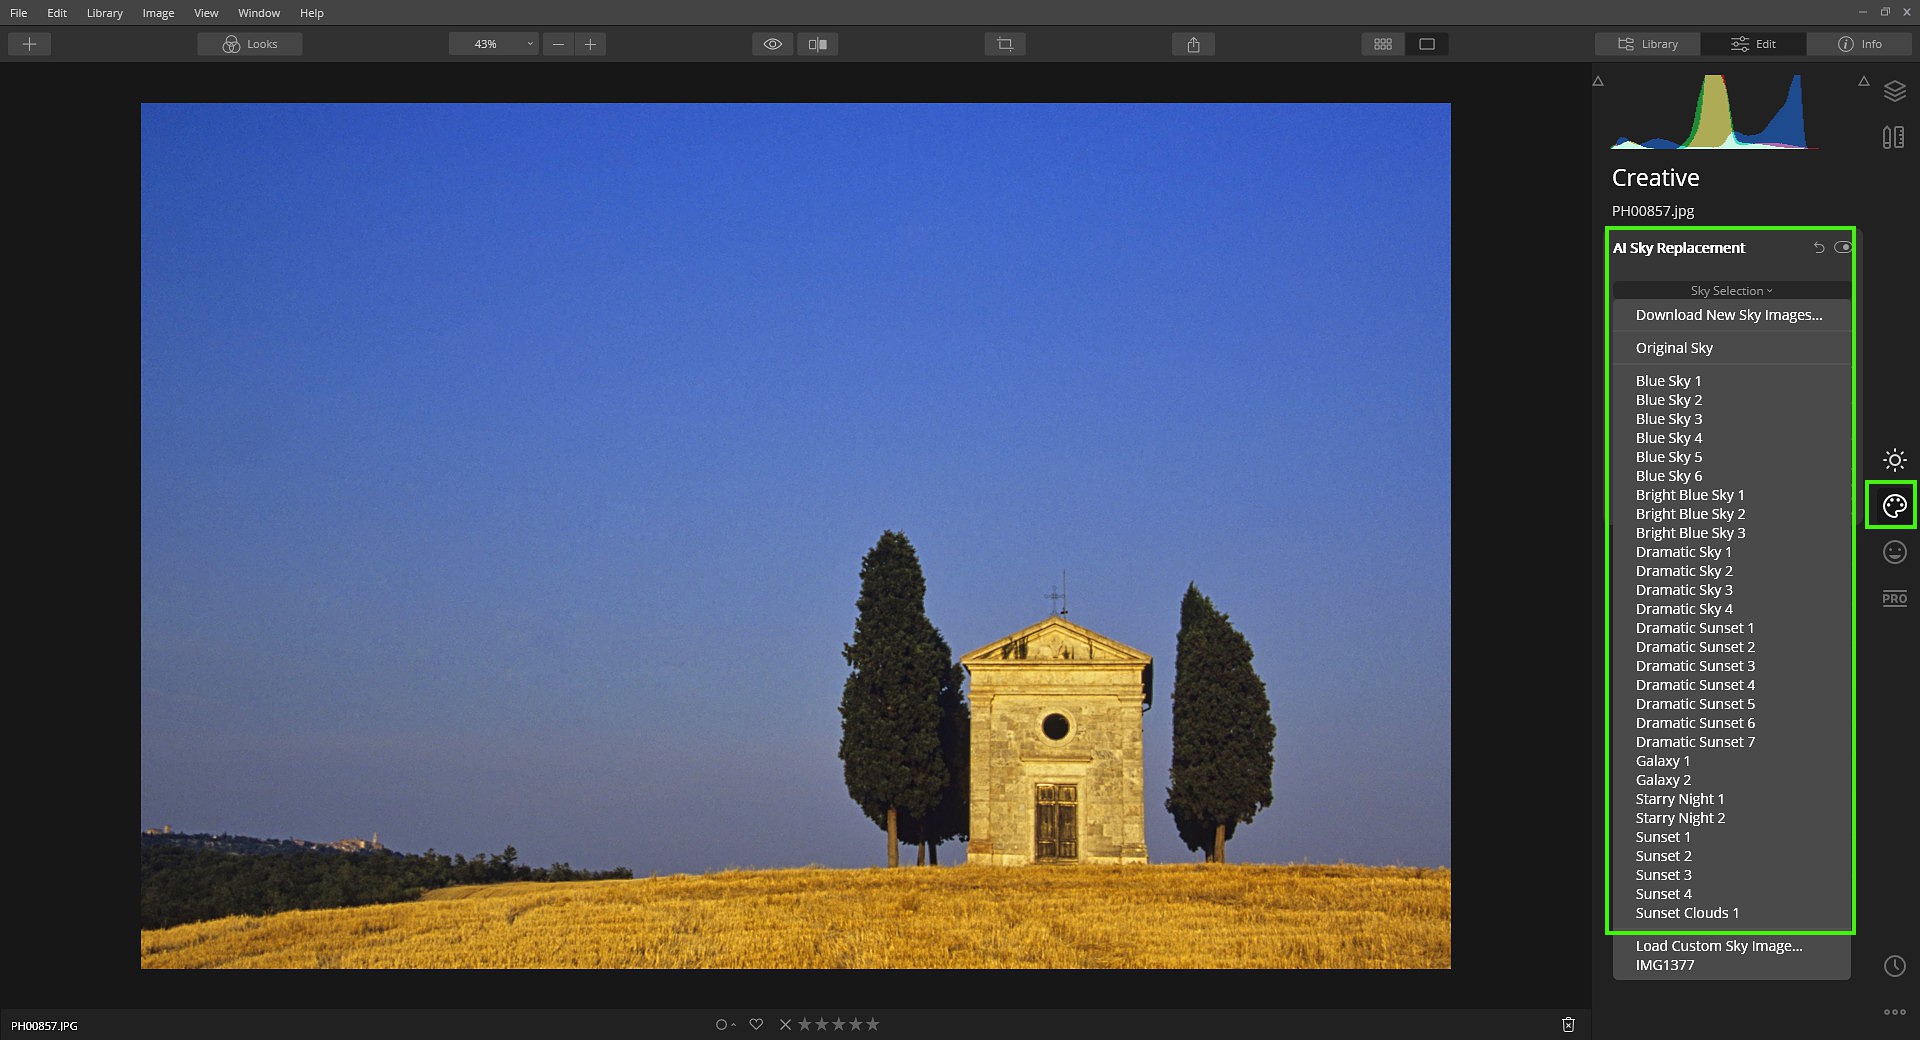
Just use AI Skin Enhancer and? Portrait Enhancer together for a portrait photo that you want to improve somewhat.?Success is inevitable, or expressed differently, it works perfectly in any case. On the screenshot with the model you see the presets below and the image folder as a filmstrip?on the left-hand side. You can hide or display both. AI Sky Replacement This feature makes Luminar 4 unique. This is image editing at its best. Positive surprises by the dozen.
The plan was to take a photo of this wonderful old building in Tuscany, Italy, with a few clouds in the sky. So you take a look at your weather app if there are clouds to come. Then you have to wait until the scenery corresponds to your intentions. It would also be conceivable to have photos of clouds back home for later insertion into the picture. This might certainly be fun and not the least "boring". While creating a mask you especially would have to chop the grass and the trees from the fuzzy edges, which is time consuming as hell.
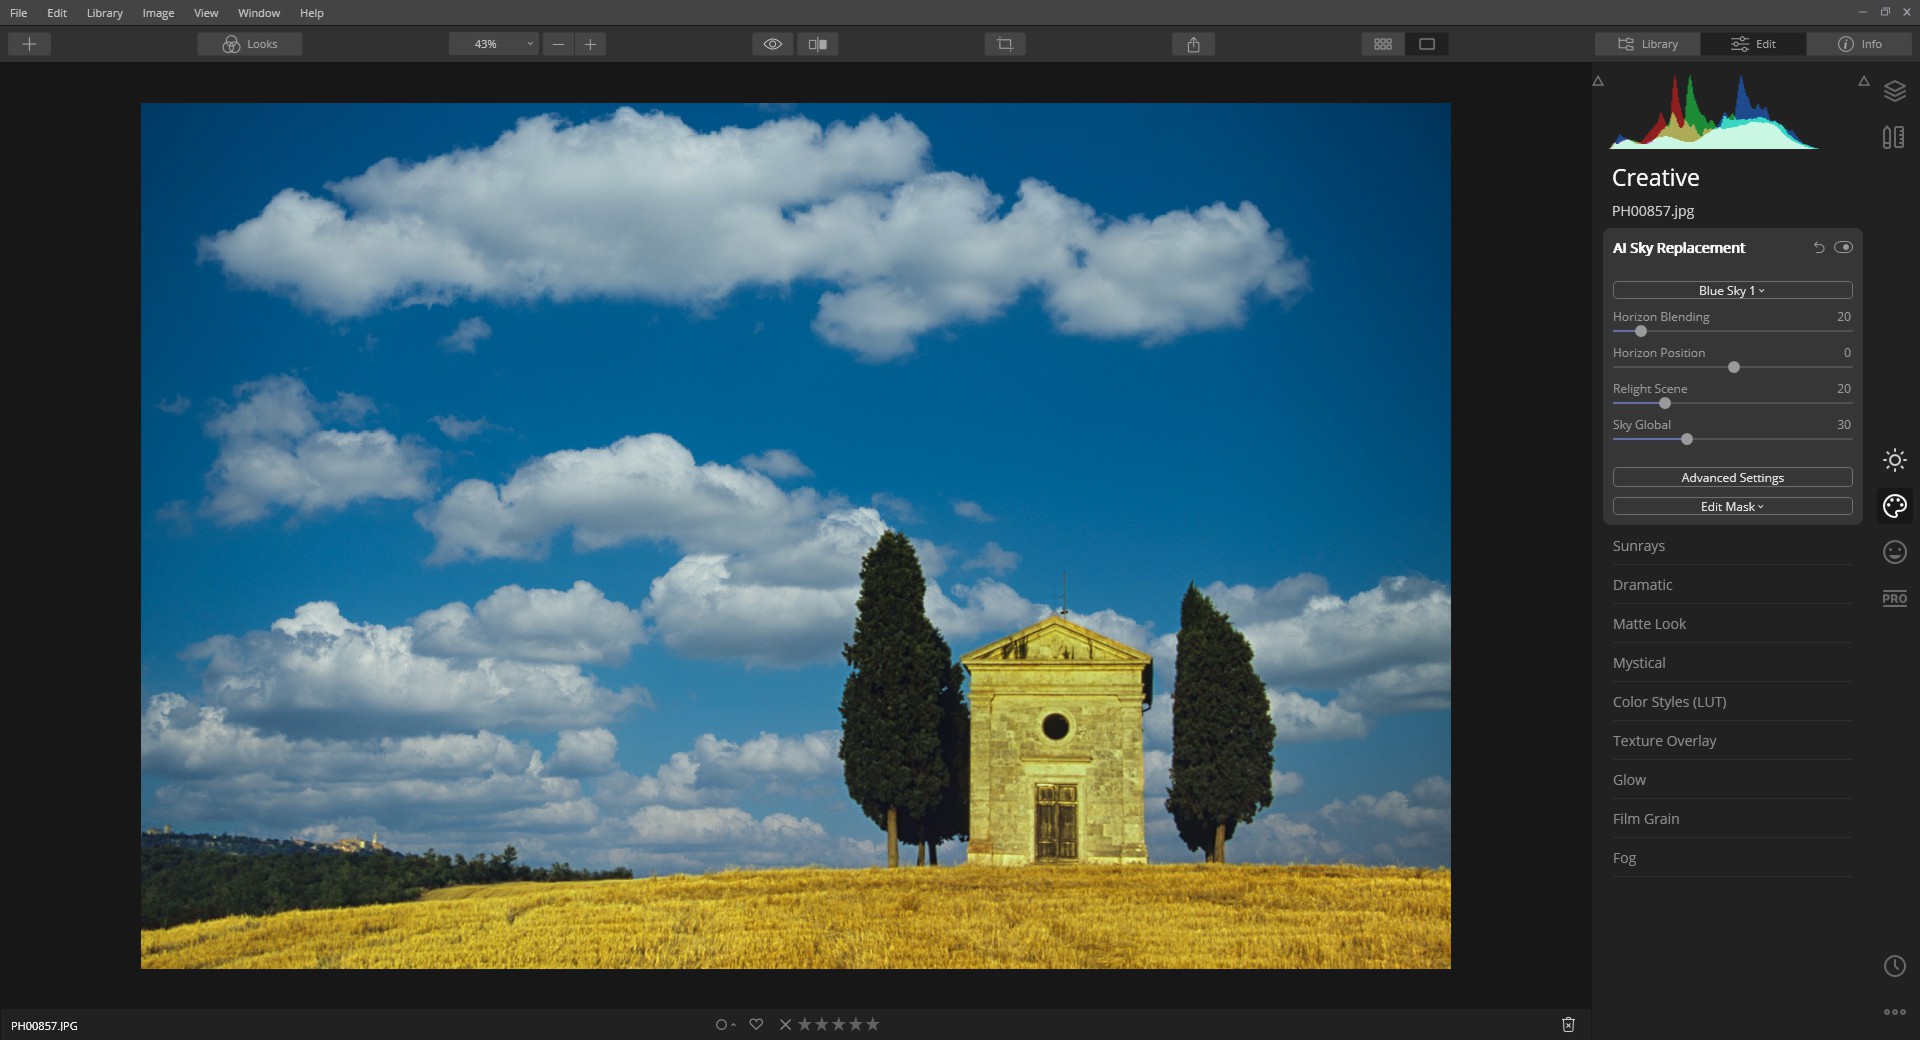
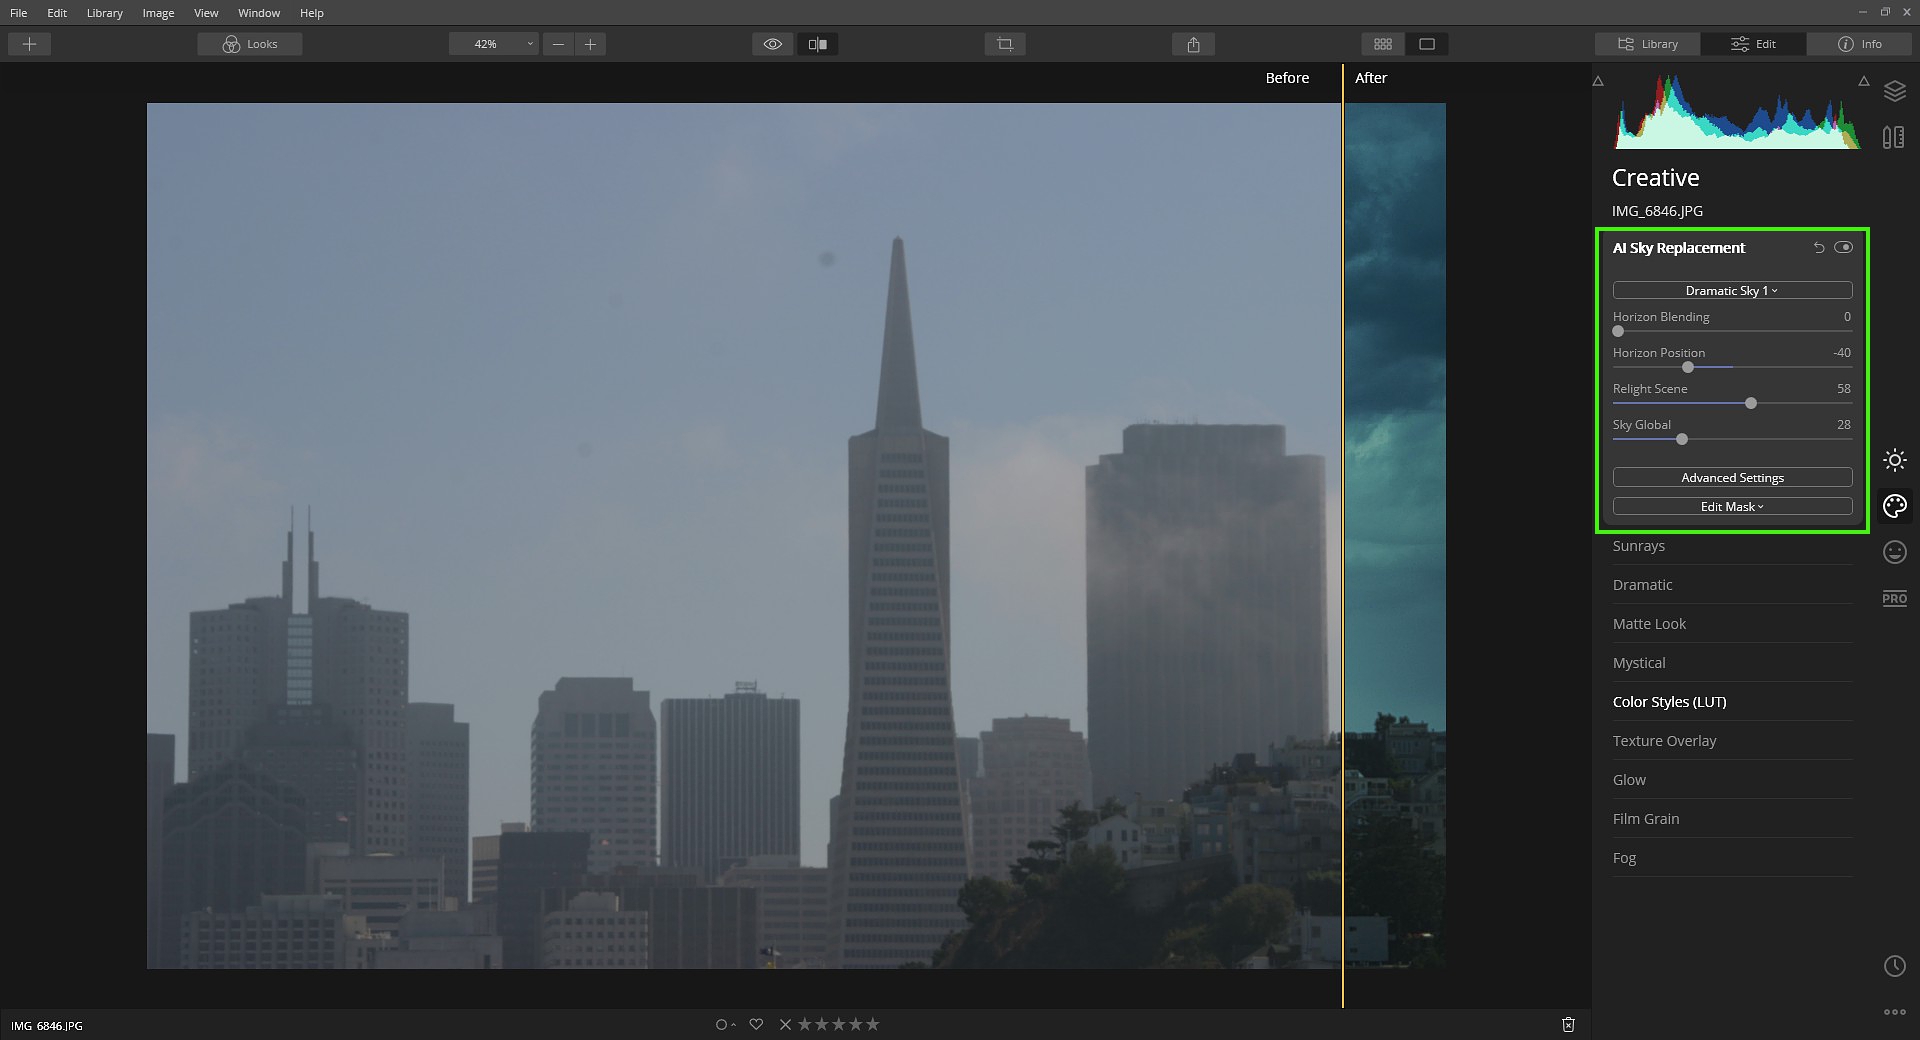
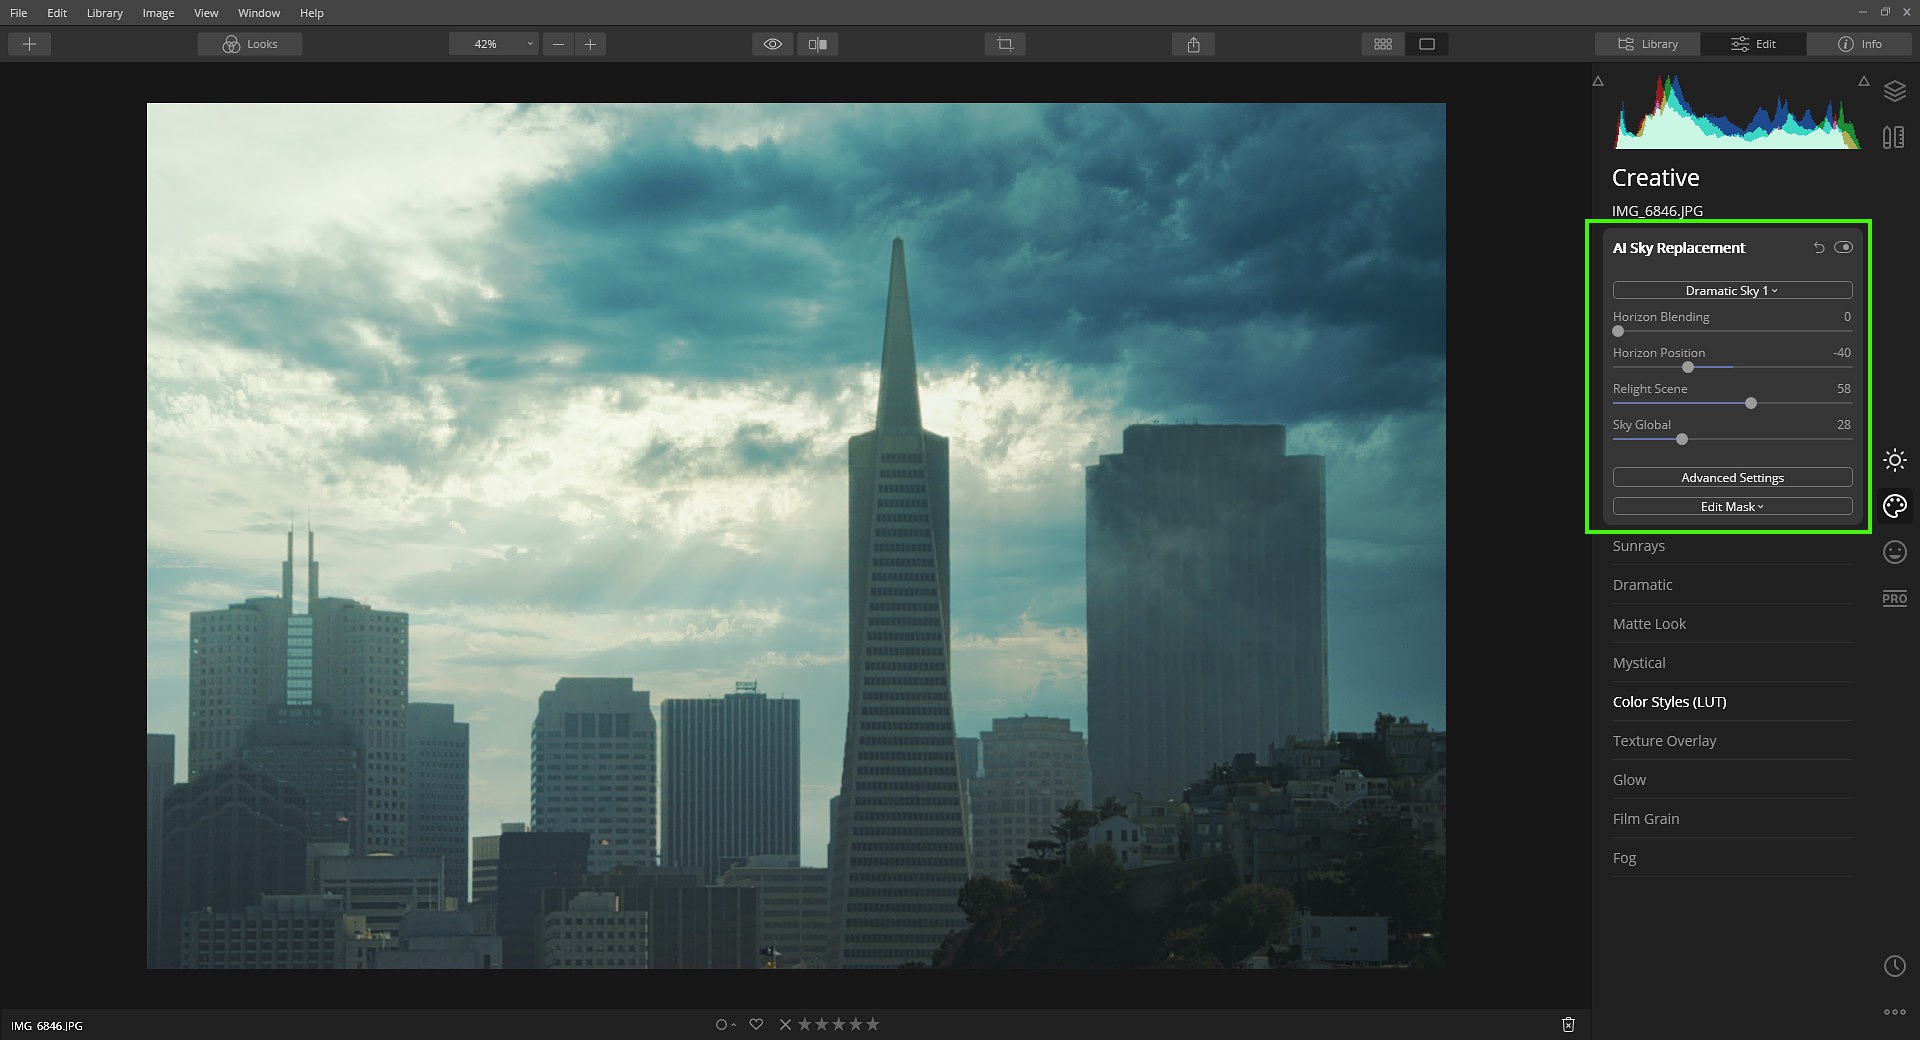
It works faster and is more comfortable to possess Luminar 4 - then a mouse click is absolutely sufficient. For this example the Blue Sky 1 preset was used without further adjustments. Believe me, when you see this process for the first time, you will not only be surprised but stunned. Don't forget to close your dropped jaw again! One more sky I do have. Harald once visited San Francisco, but the mist?made it faster there.?Yet he would not let himself be distracted by such a nuisance. Defiantly he pressed the camera shutter. Probably a bit more often than necessary. The yield was not especially high-end, but very standard holiday photos.?Someone with a cheeky mouth would have said: ?You could have done without these photos!?. (On other occasions he made even worse photos, but then on purpose, to make them great again with his Photoshop plugins. But that is another story).
Such a complete photographic failure is challenging to me. Let us have a look how AI Sky Replacement engages this produce.?I would not want to participate in a competition with such a photo (at least not under my name), but lets see what is feasible.
The skyline of San Francisco does not look that boring anymore. Luminar 4 has surprised me once more in a positive way. Only 3 mouse clicks were necessary.?Image processing can not be faster and easier in any other world.
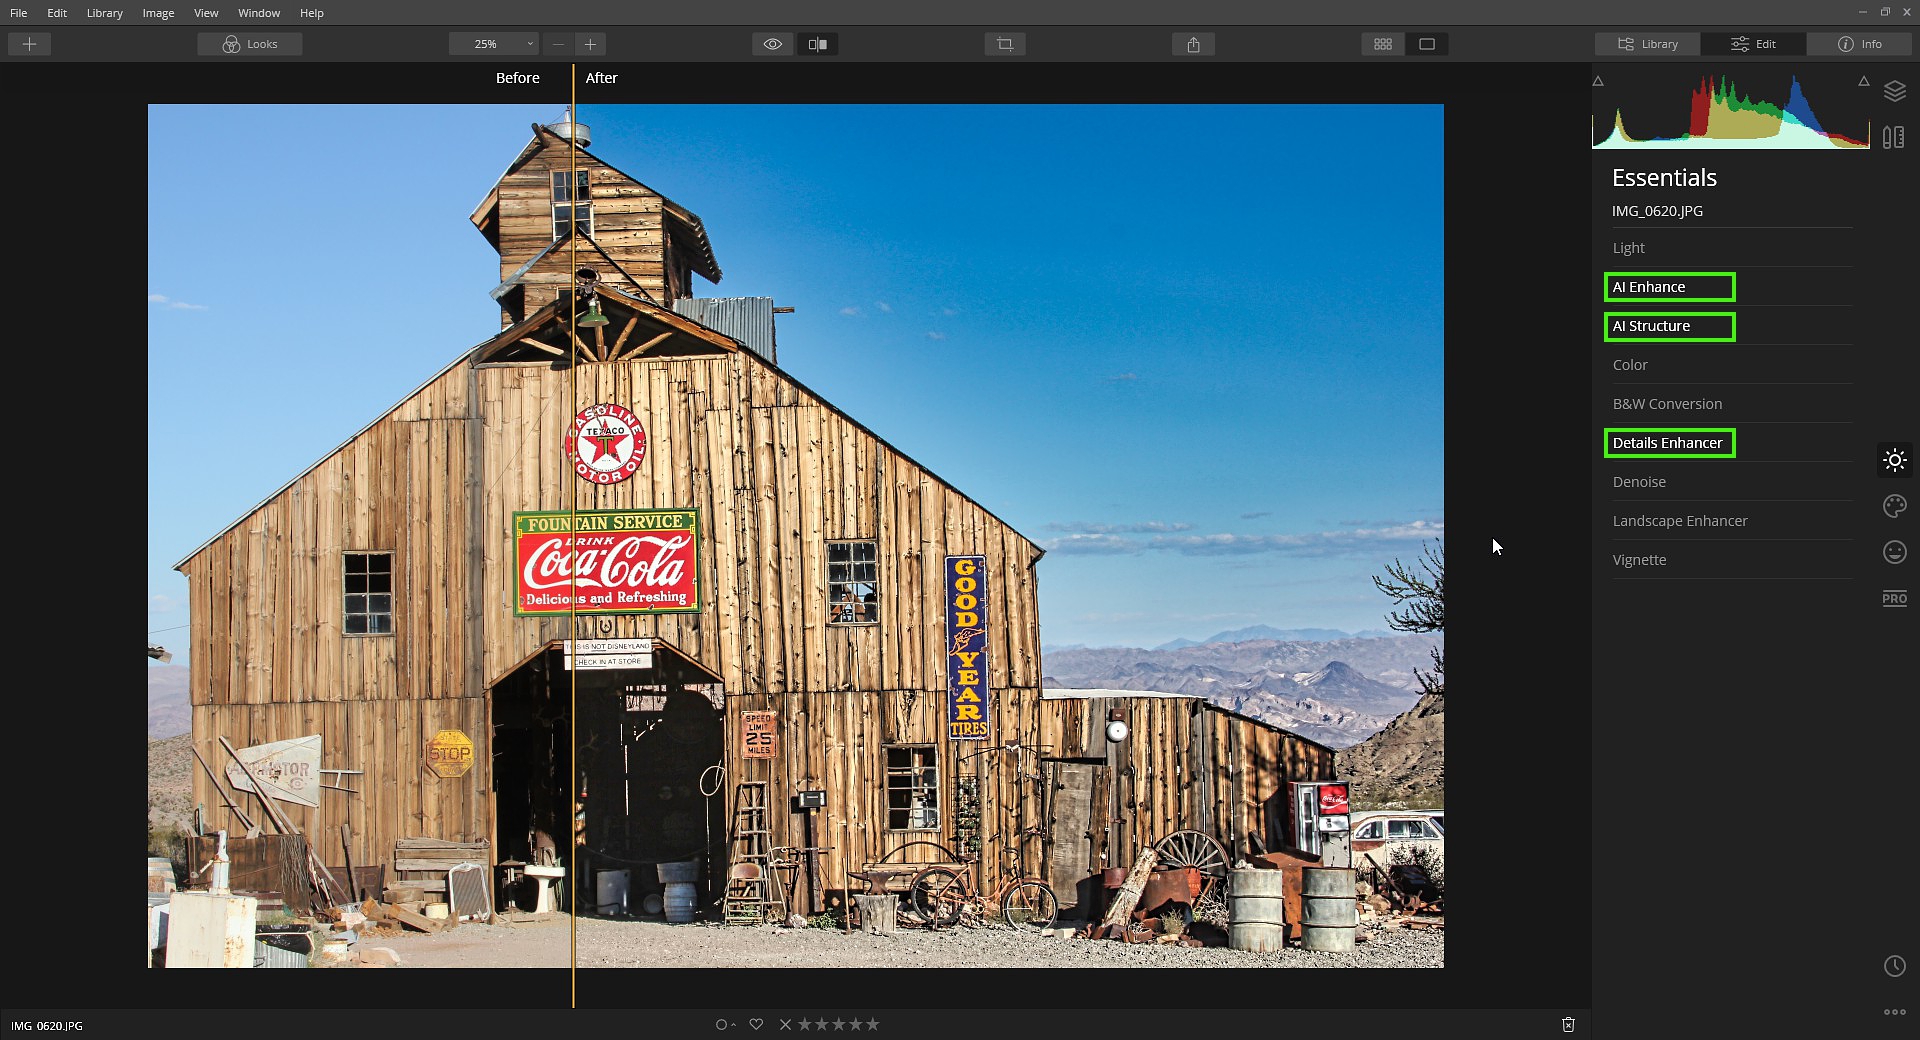
AI Enhance / AI Structure / Details Enhancer With these 3 features I will turn a somewhat tedious photo into a stunning image with more contrast, details and fresh colors.
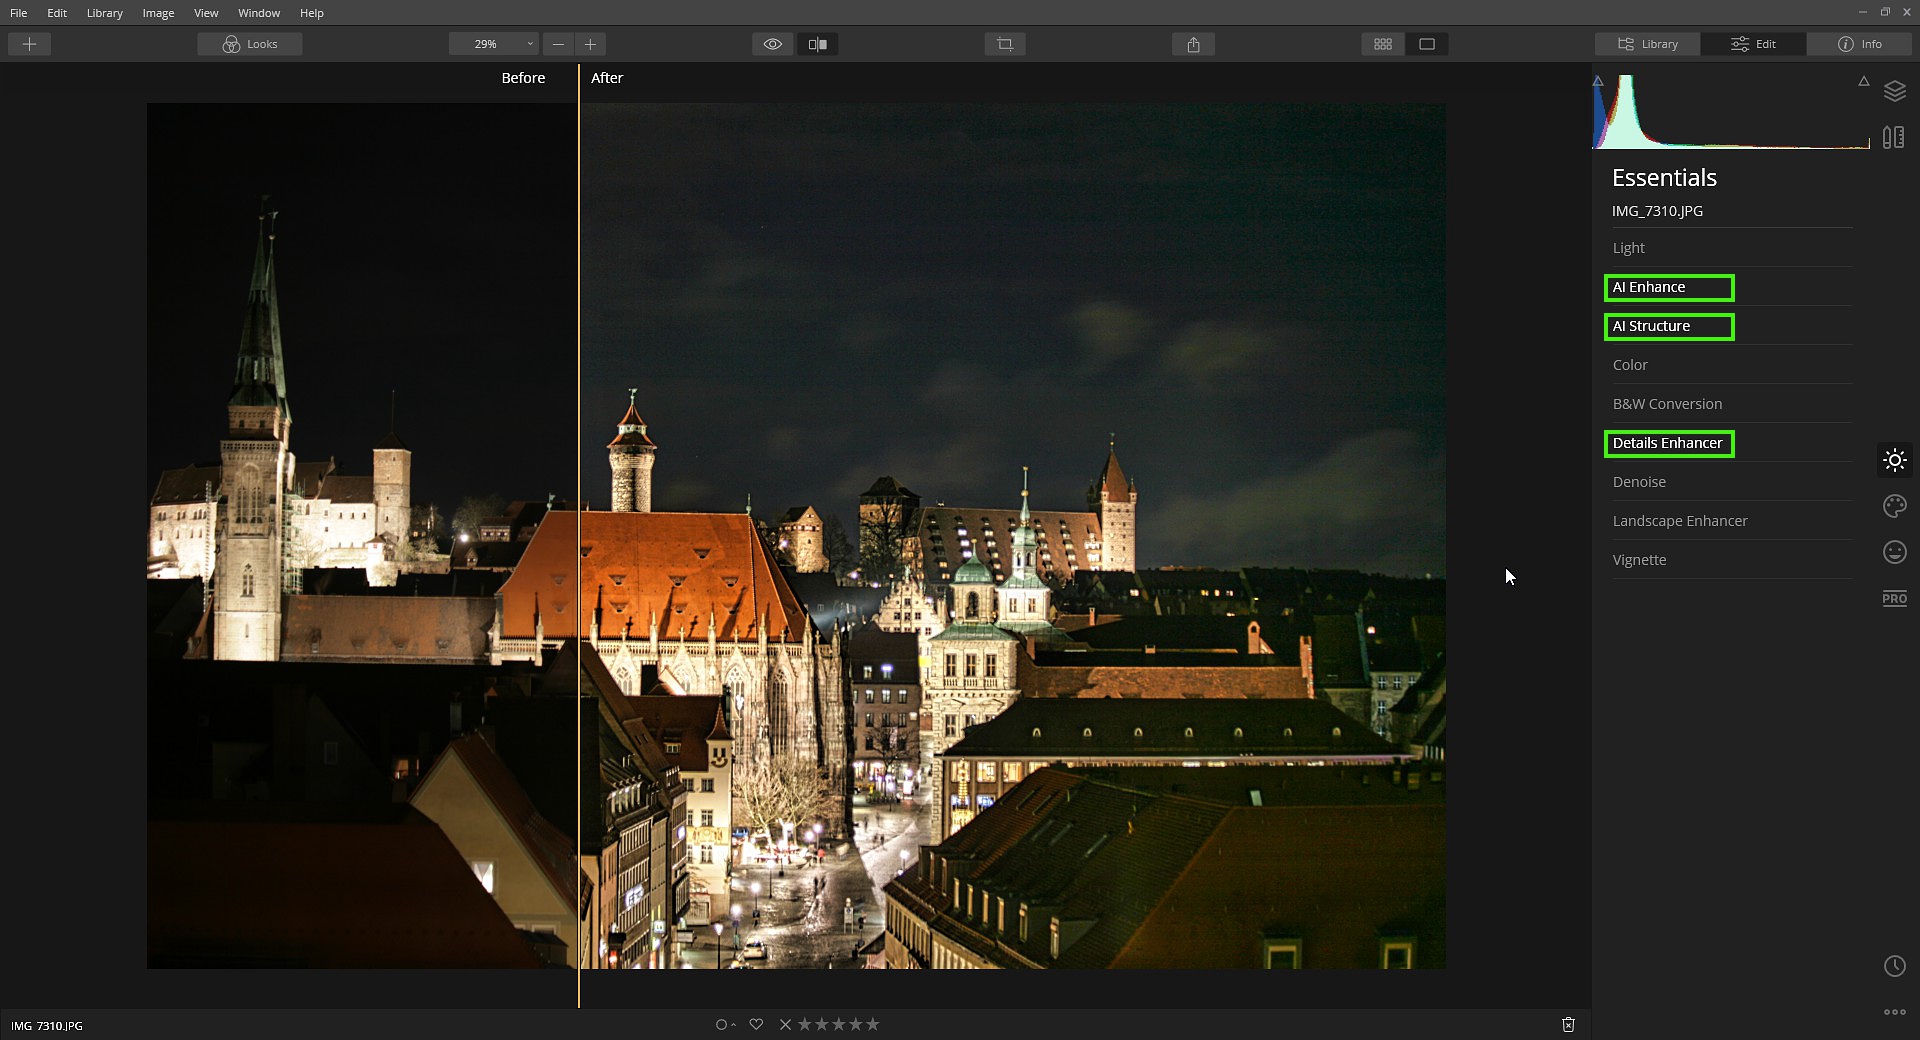
Once again this optimization happened rapidly and easily with a convincing result. The process almost feels like playing, because everything works so effortlessly. What are these three functions with identical settings?doing to a completely different photo? For this purpose we beam ourselves from Nevada by day to Nuremberg by night.
This example of ?Nuremberg by night? demonstrates that a night photo can be processed with rather easy peasy methods as well.?Anyway, now you can see more of Nuremberg at night. Would I insist on hanging this image in large format on the wall, then I will not conceal that some additional work was awaiting me. By brightening and enhancing the contrast I got a rather noisy sky. Usually more is needed, not just 3 mouse clicks, but? Luminar 4 again provides a suitable method.?With a layer and a brush tool can you limit the noise removal to the sky area.
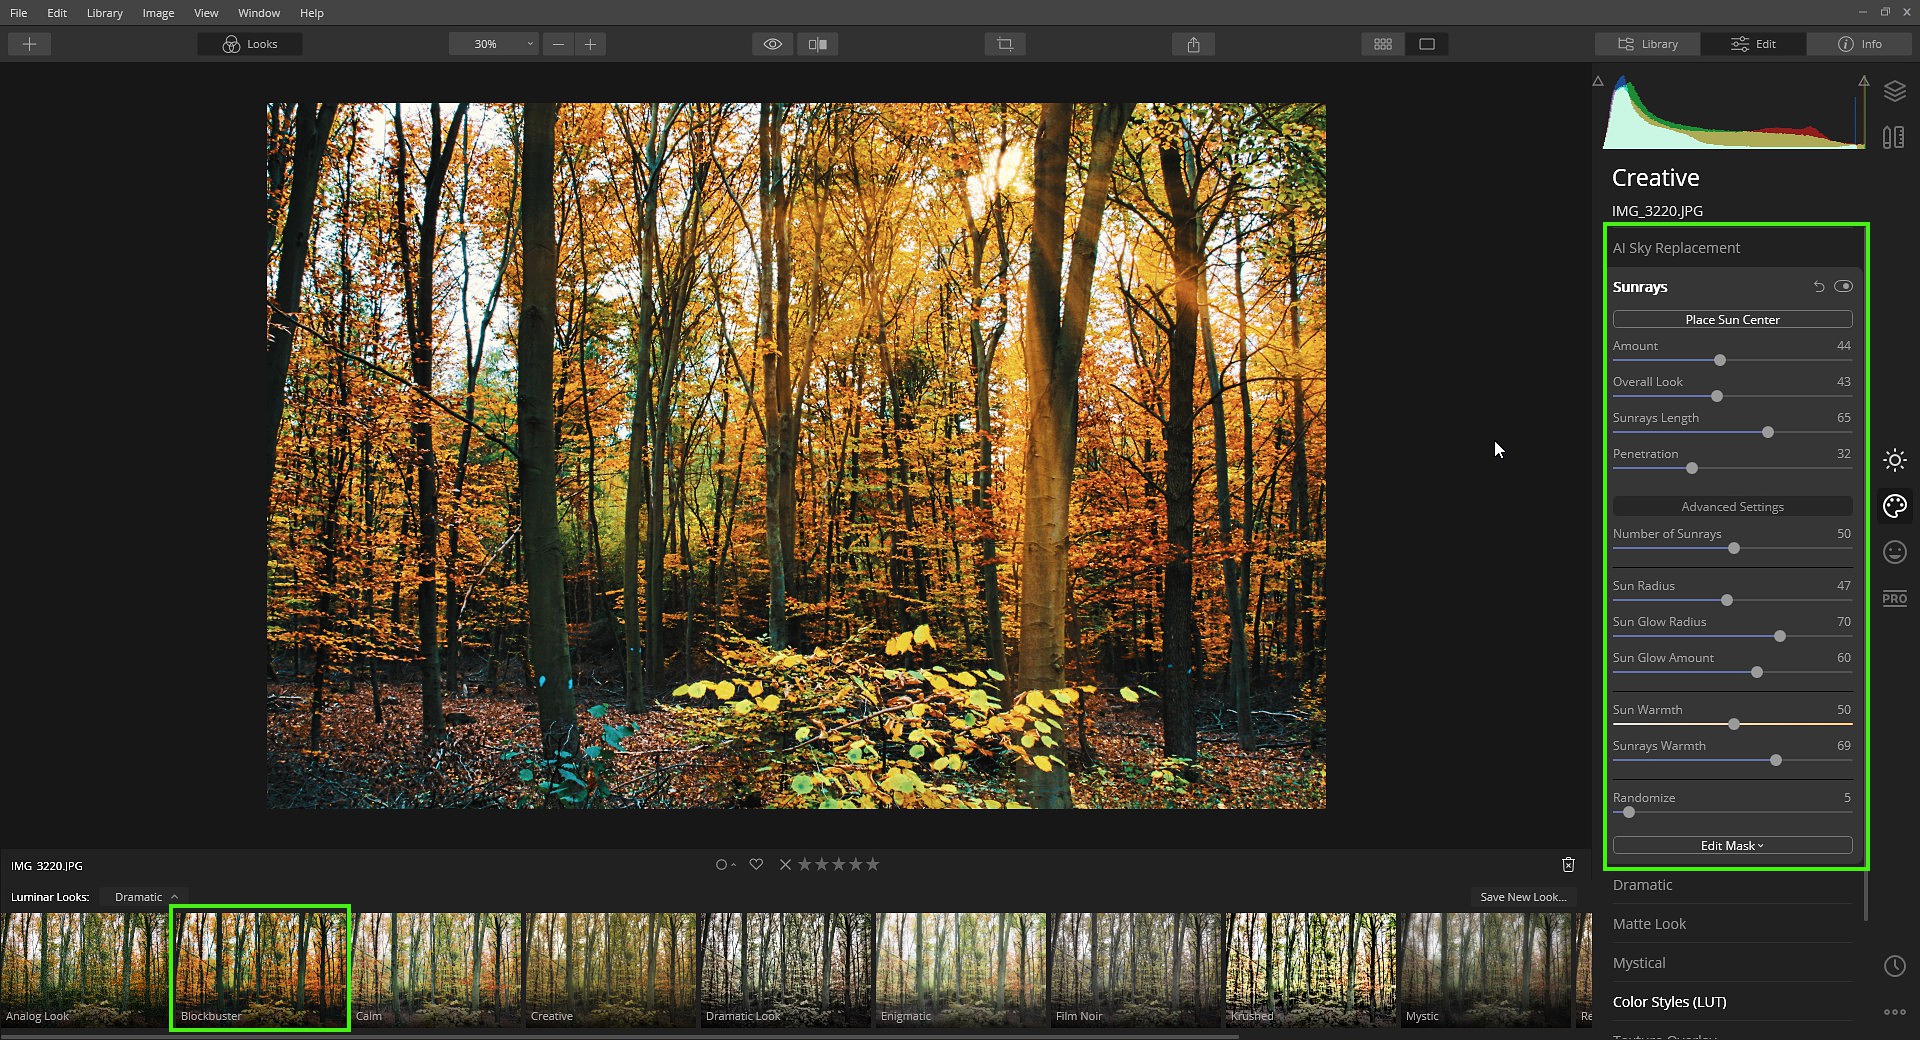
Luminar Looks: Sunrays In addition to changing light and colors I like using Sunrays which is my preferred and so-called ?toy?, although it delivers professional results and is really fun at the same time.
Luminar 4 features a lot of presets that make the work even easier for you.?They are called looks. On their website you can find further looks?for free as well as for dough.?The editing is very easy, you click on thumbnails until you like the result or your index finger snaps off.?Own settings can be saved as looks as well. If you want to arm several photos with a similar appearance, then such a saved setting is excellently suited. For the example I chose the?look Blockbuster from the group Dramatic and kept the opacity at 100. The forest manifests itself in strong motley colors by now. For sunrays the function Sunrays is activated and with one mouse click on the image the sun is glued in place - provided you are an expert.?Do not bother whether the position is correctly chosen at once, because you can drag the sun to any place within the photo by holding down the mouse button.?In such a case you may probably play around longer than originally intended.?Moreover, further settings deliver any creative freedom you can think of.
If you like working with looks, then do it like a pro and get another trusted person involved when selecting them. This way you can test and discuss them for hours before you make a decision.?Of course, I have done that differently and made a selection all by myself, which was so much faster. Believe me, the looks are really a great thing.?Whoever does not like making decisions instantly may need some more time after all. Above the?Enigma look from the group Lifestyle was chosen.
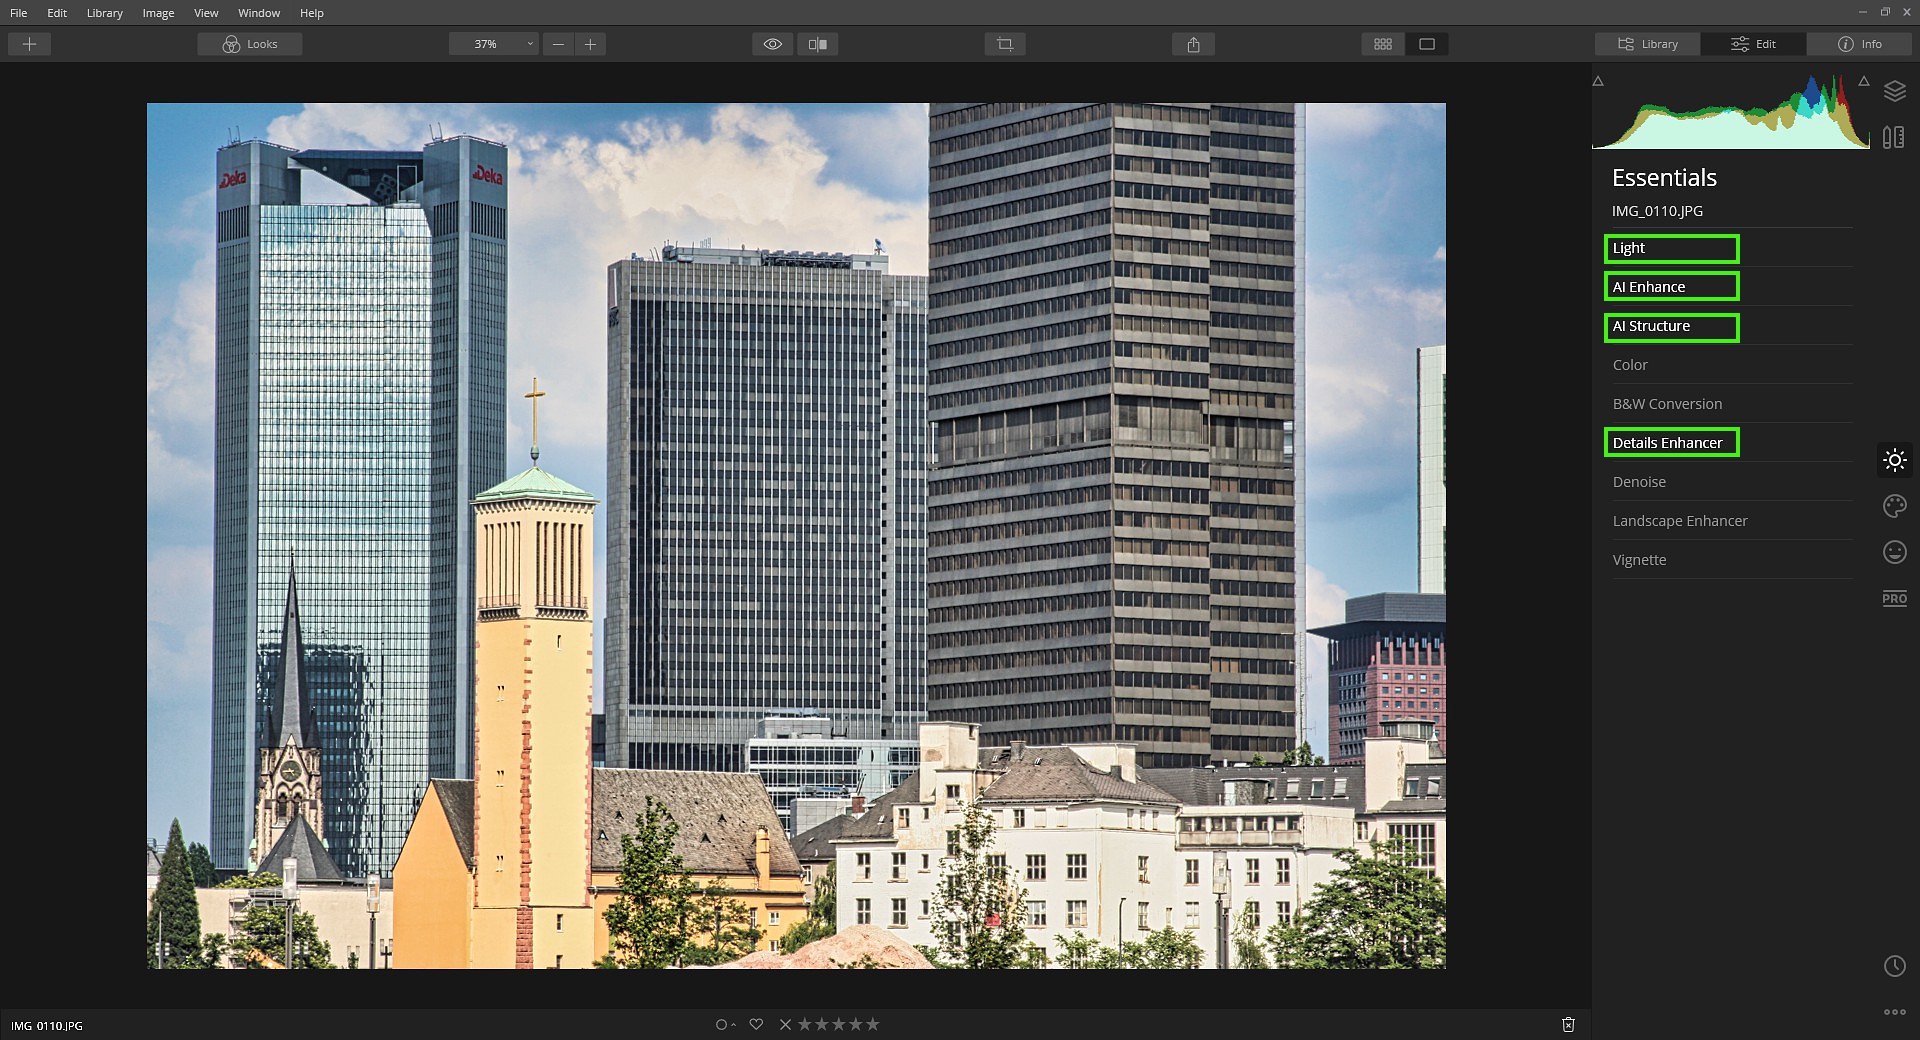
Light / AI Enhance / AI Structure / Details Enhancer Here is another example to follow, nothing special, just a photo of Frankfurt. But here I can demonstrate to you rather well, how excellently Luminar 4 corrects the image and this in a familiar fashion very fast without problems. I simply used Light, AI Enhance, AI Structure and Details Enhancer one after the other, with individual settings, in the group Essentials and was satisfied with the result.
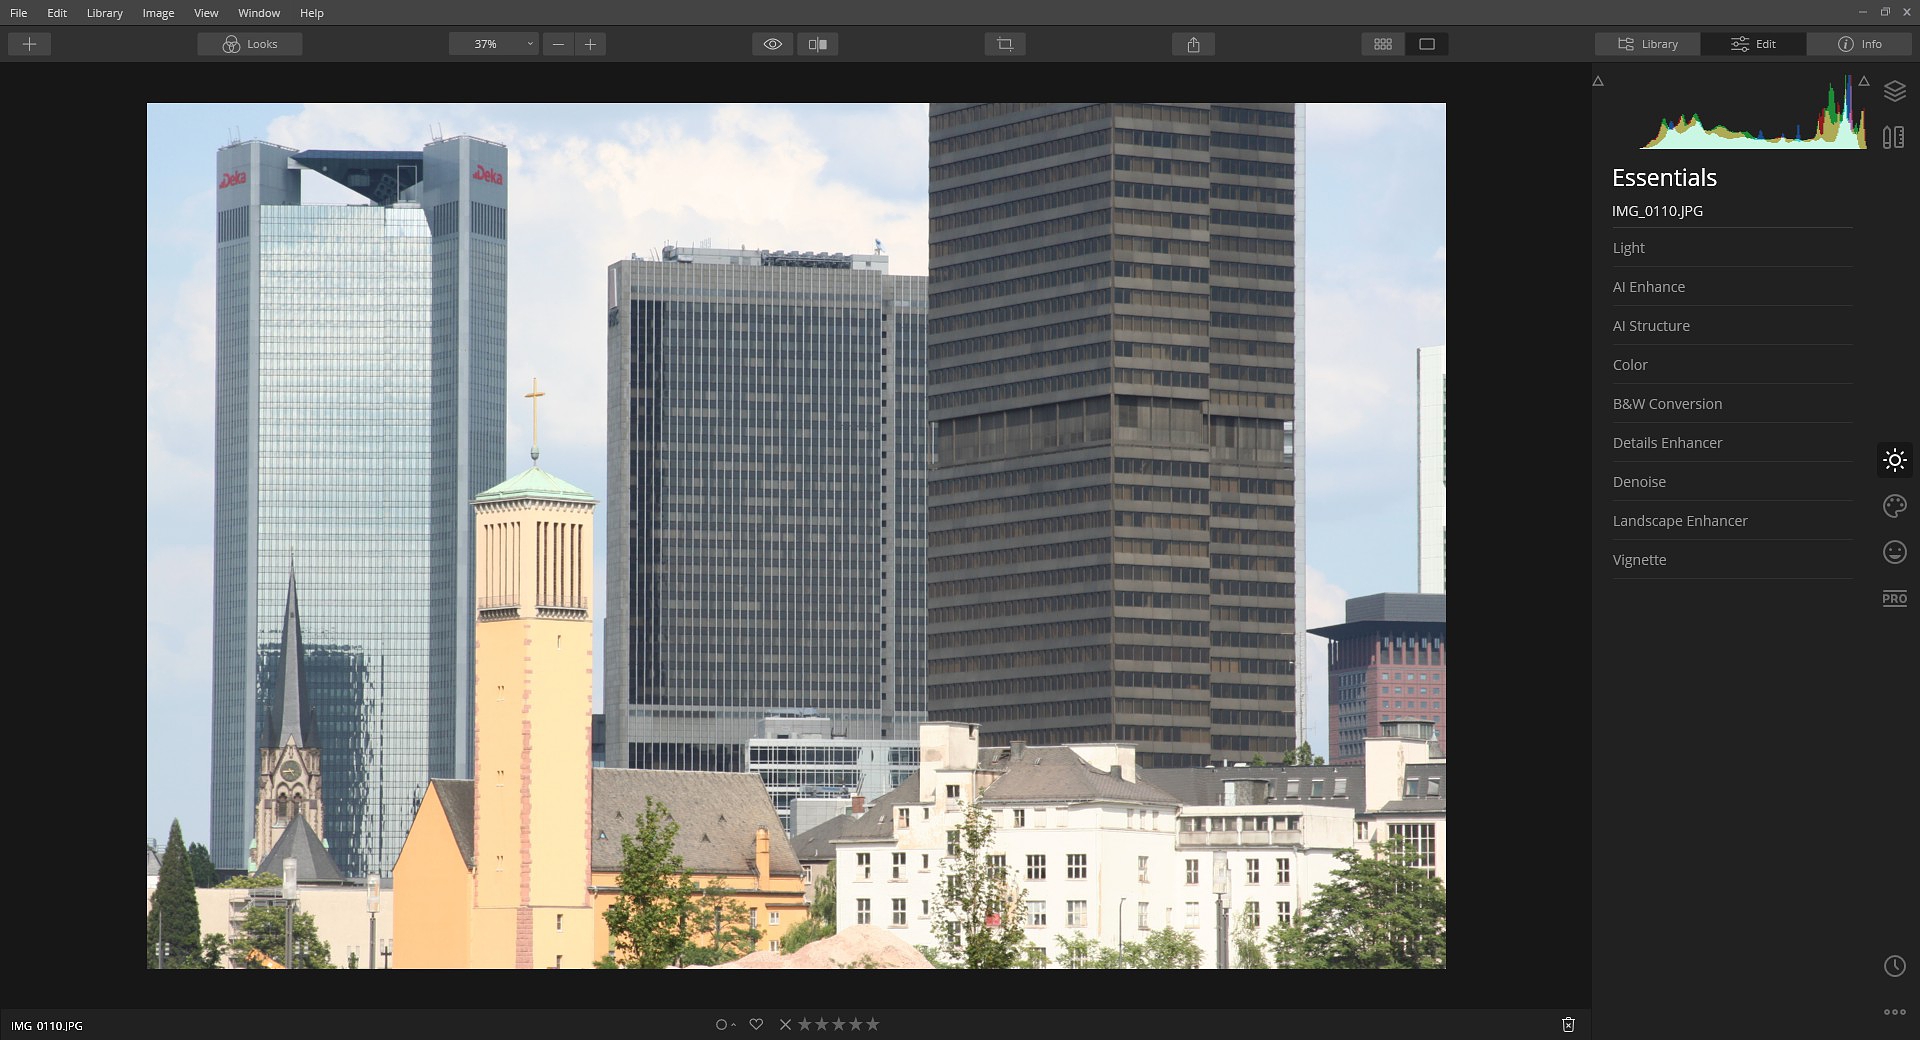
The editing work can be judged better if I show you the original image without any improvement in the following screenshot:
Easy to see, the processed photo shows more details as far as the buildings and the clouds are concerned, the partial?overexposure in some image areas was reduced. To remind you, this all happened wit only a few mouse clicks. I would like to end my review and recommend that you visit the website www.skylum.com. Here you can find videos and further information on the most important features of Luminar 4. You will also come across special offers here that you may want to use. As always I wish you felicitous photos and - if needed - satisfying image editing results. Kay Michael Kuhnlein
|
Return to the Main Reviews page