Plugins for Photoshop, Elements, Lightroom, PSP & others
Plugins for Photoshop, Elements, Lightroom, PSP & others

Exposure 5
by Kay Michael Kuhnlein
|
||||
|
At the beginning I want to share my joy with you: I am allowed to buy the plugin Exposure 5 as a full version or an upgrade. Really, you are reading correctly: BUY. I am not forced to rent it as an stupid cloud version, no, it is completely mine. Now I could still spend hours writing about Adobe and their odd distribution policies, but this is the wrong location here, that is why I would like to return to the actual topic.
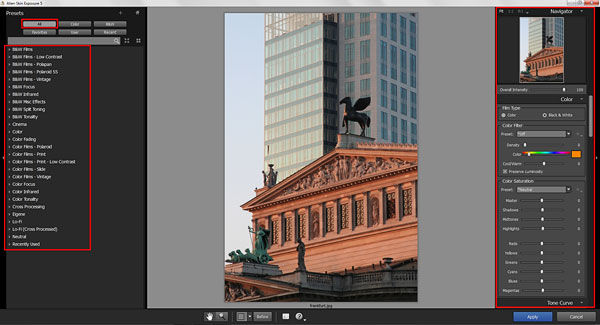
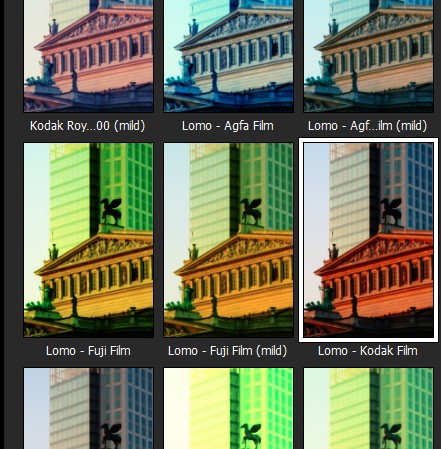
Presets with Preview For the new version of Exposure the user interface was completely modernized. Each preset goes with a preview thumbnail, the same is provided for the additional effects “Borders & Textures”, “Light Effects” as well as “Dust and Scratches”. Let us simply load a photo and look together at the user interface.
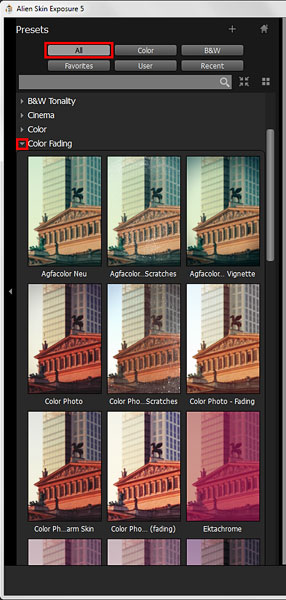
In Exposure 5 you can see a small triangle before each group. With a mouse click you get to the corresponding presets that show you a clear preview thumbnails of your possible result. That is the way I like working! Exposure 5 provides 187 presets for black & white image effects that are distributed in 10 groups. For color effects 187 presets in 14 groups are available. Once again I would shamelessly claim that no one in this world needs more.
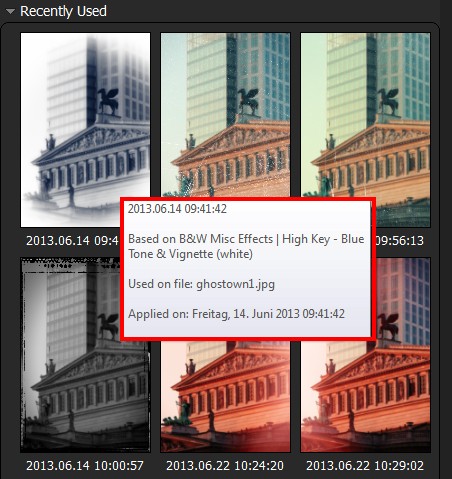
Due to a lack of space the complete name cannot be displayed with some preview thumbnails which is neither really necessary. Exceptions are the last applied effects that are listed in the “Recently used” group. The full information might be really useful here if the already earlier used effect is to show its result on another photo. Then simply move the cursor onto the desired preview thumbnail and just wait until all the information is shown. There is a lot more to explain, but one step at a time. Now we test a preset and judge the result.
Using a Preset
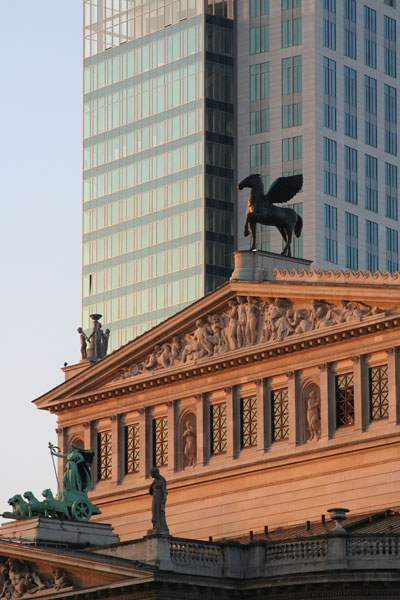
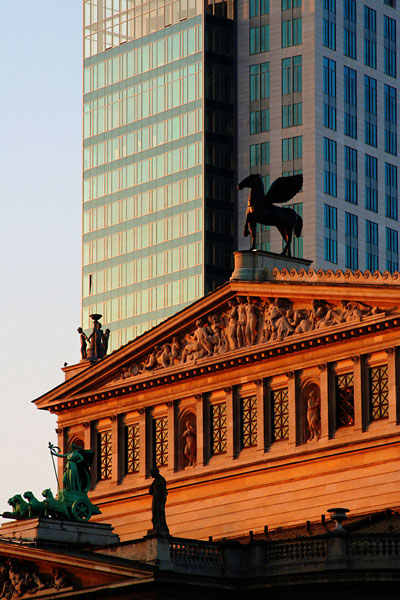
The example photo was taken by my wife. We both liked the theme, the photo only seems to be a bit dull. Now you will experience right away how Exposure 5 will be commanded for optimization without squinting slavishly for an analogue film effect. It makes no difference that I am using a preset nevertheless.
For this practical test I examined a large part of the presets and finally came across the group Cross Processing and selected the preset "Lomo – Kodak Film". As you will instantly see, the plugin offers a huge variety of adjustment options that help me processing my image individually in further steps. In this case my wife was completely content with the result. To stop here is advisable for me, because what my wife says is law. I will show you the additional options with another image.
Fantastic atmosphere during sunset with only one mouse click - Photographer: Silvia Kuhnlein
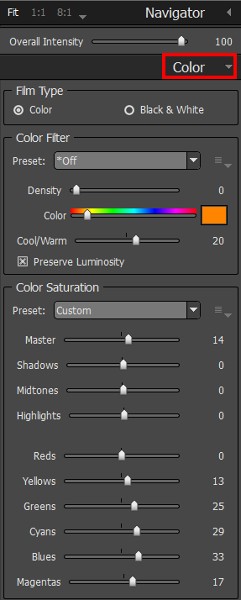
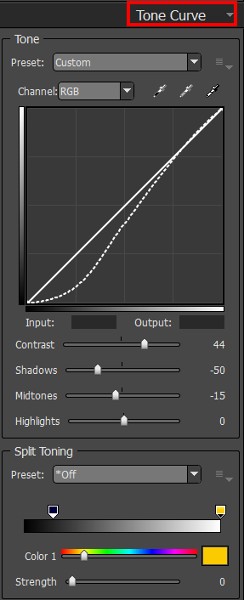
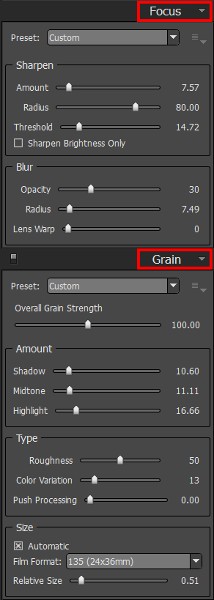
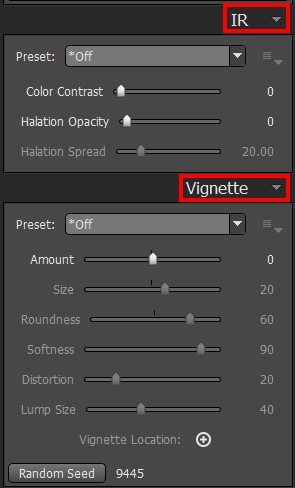
Individual Settings No matter whether you choose a preset first or start with no effect at all, on the right-hand side of the program window are numerous adjustment options available. Here you let off steam as you like and adjust your photo according to your needs and preferences. The following parameters can be adjusted in separated windows:
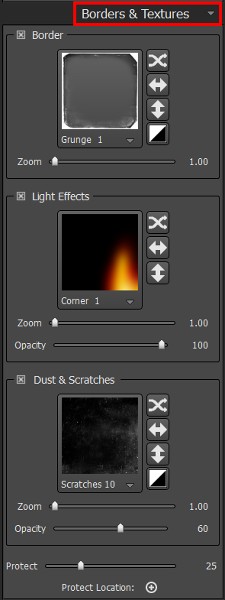
Borders and Textures with preview thumbnails for the offered presets
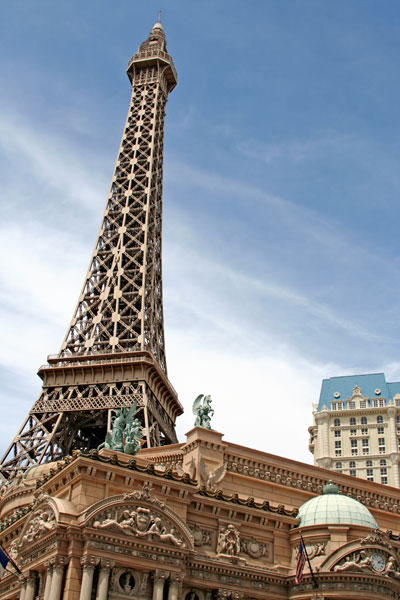
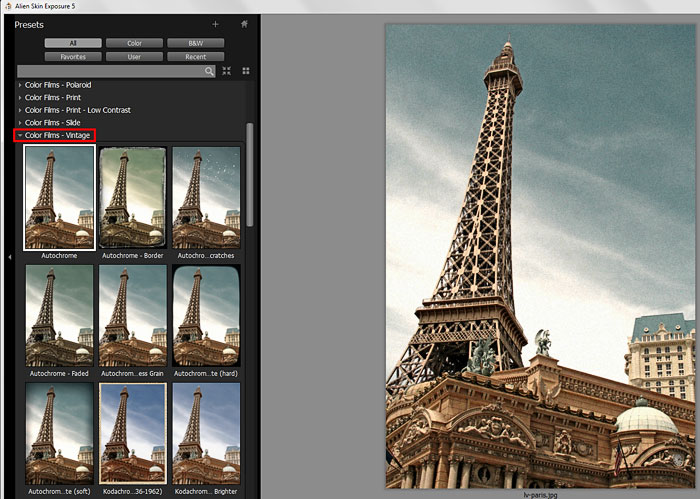
Preset and Further Individual Settings You will now see a further little practical test, for which I first chose a preset and afterwards let individual settings lead me to the desired result. As an example image I selected the Eiffel tower, not the original one, but the emblem of the Casino “Paris” in Las Vegas.
Exposure 5 starts with the last chosen setting. If you don´t like it, you can any time select the group "Neutral" in order to get back to your original image. Everyone will certainly act differently, but in almost all cases I would start with a preset and continue from there if necessary. In this case I would like to give the image a vintage effect. In this process I neglect the coloration and exposure that was prevalent when the photo was taken, because I prefer a WOW effect.
The result of the preset is the base for further processing.
According to this motto I first select the preset "Autochrome" from the "Color Films - Vintage" group. In the next step I would like to add a vignette.
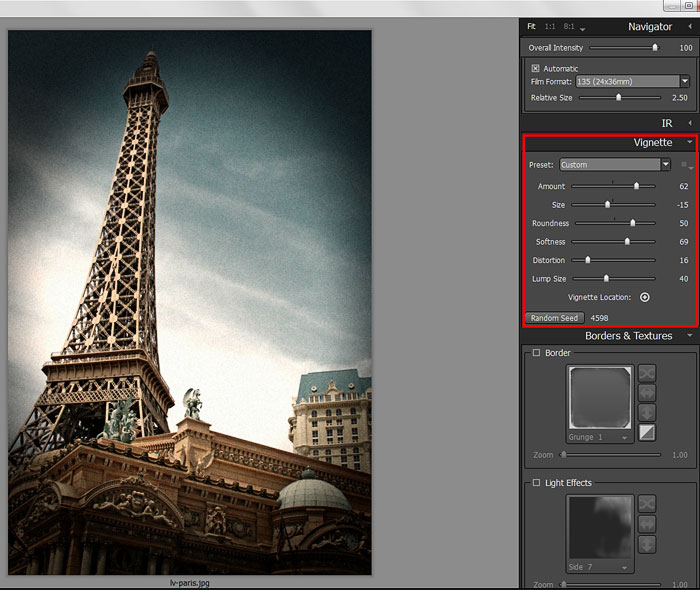
For this variation I chose the Vignette category on the right-hand side of the user interface, where I adjust the slider and determine the position by clicking the mouse on the preview until I like the result. It may probably have a rather positive effect on my photo if I add some light effects. Here you have a huge variety of presets with quite different effects available. Although I don` t want to complain I have to admit that I need several mouse clicks until I am satisfied.
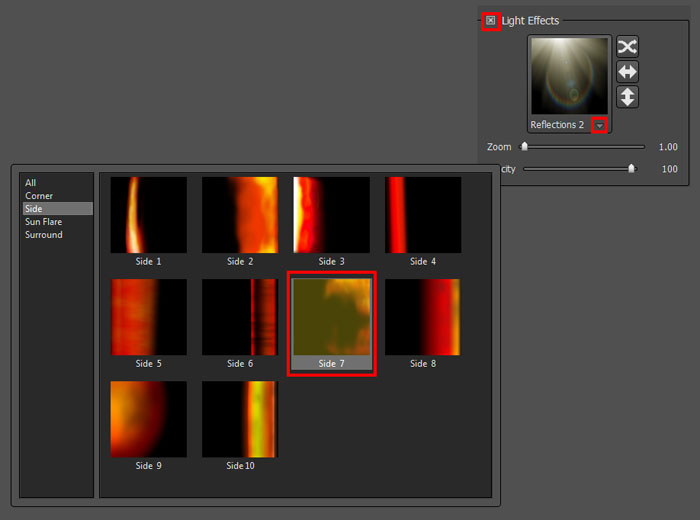
Light Effects Presets with preview thumbnail
The Light Effects work with presets, you have to go this way: click to the left of the effect name in order to activate the category. Then below the thumbnail click on the small triangle which will make the plugin display a selection of all effects. For my example image I chose the group "Side" and decided on the preset "Side 7".
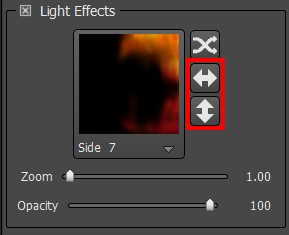
This will mirror the effect
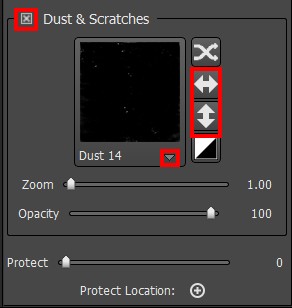
Dust & Scratches are also available with Exposure 5, they are rather suitable as far as a vintage effect is concerned.
Dust & Scratches is handled according to the same principle as the Light Effects.
It is most likely that you would have preferred somewhat more decent effects. No matter how you may see it - at any rate you were able to notice how to use the features in Exposure 5. This is the actual meaning of a review as I see it.
Example for Color Adjustment
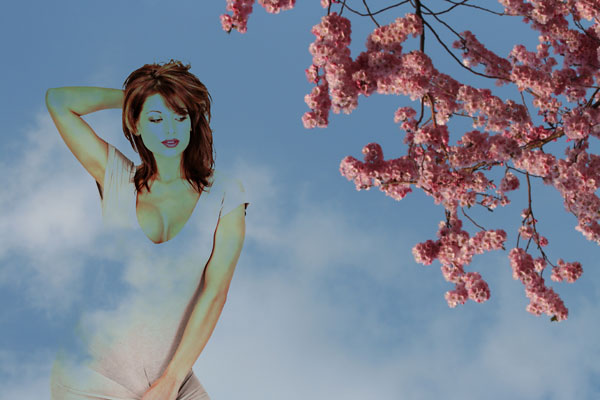
The photo is to be adjusted color wise. Photographer/image processing: Kay Michael Kuhnlein.
Lets assume you want to insert the already existing photo composition with the flowers of a tree and the model into a web page or a printed matter. Your plans tend towards on a pink coloration. As a matter of fact, your flowers are already pink, but the remaining area does not really fit yet.
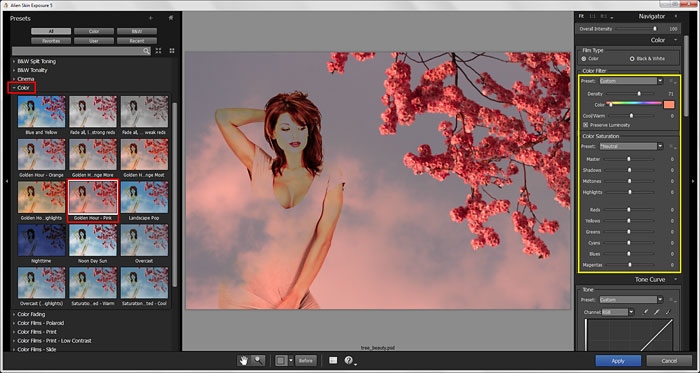
For such a case Exposure 5 is a suitable tool. In the left area of the user interface I found the preset "Golden Hour - Pink" in the group "Color". For my purposes it is almost ideal. Should this be different in your case, then please do not forget to exactly adjust the numerous setting options according to your preferences on the right-hand side. I cannot resist my instinct to play around, which is once again bigger than my rationality. That is why I am testing an additional Light Effect.
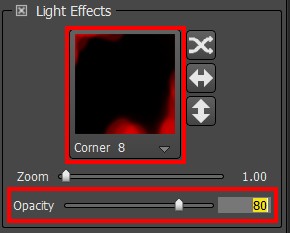
That is the used Light Effect
I chose Corner 8 among the presets, the opacity value was set to 80.
You will certainly not be astonished that I like my result
As you can see, in Exposure 5 almost all procession steps work rather playfully and require only little time. On the manufacturer´s homepage www.alienskin.com you can download a fully working demo version to test the efficiency with your own photos. Moreover you will find a video there, where the functions are perfectly explained. So stir into action and see for yourself!
|
Return to the Main Reviews page